
Difficult
Makes: 2 Yield
-
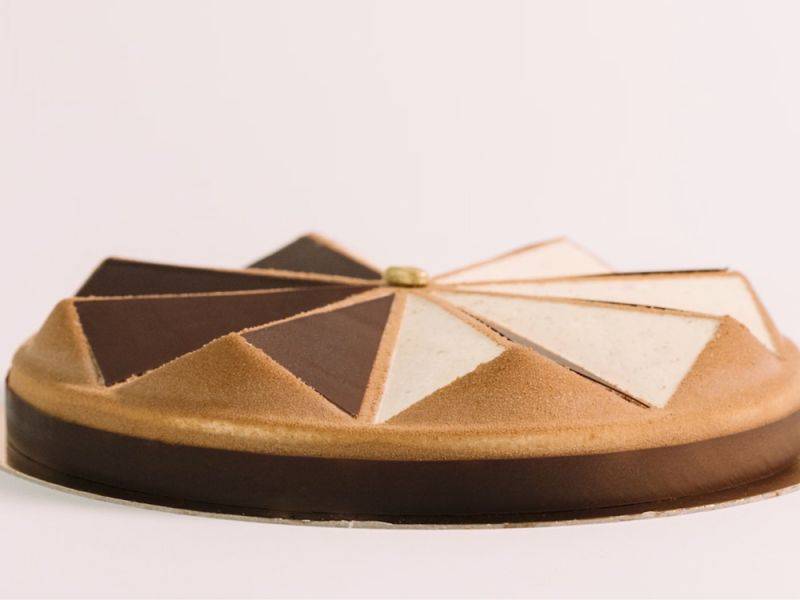
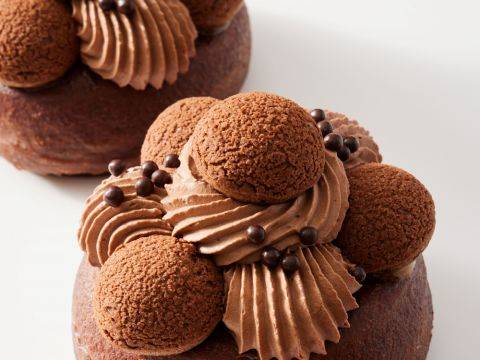
Timeless Classics
This chocolate tiramisu is the winning recipe of the World Chocolate Masters 2013. It redefines and elevates the traditional tiramisu in a truly elegant version.This chocolate tiramisu is the winning recipe of the World Chocolate Masters 2013. It redefines and elevates the traditional tiramisu in a truly elegant version.This chocolate tiramisu is the winning recipe of the World Chocolate Masters 2013. It redefines and elevates the traditi...
- Shelf life:
- 2 days
- Conservation:
- Refrigeration at 4°C
Containing: 6 Components

Chocolate Ladyfingers
Ingredients: Chocolate Ladyfingers
-
5.3 ozEggs, whole
-
0.9 ozwater
-
3.5 ozSugar #1
-
5.3 ozegg whites
-
1.8 ozSugar #2
-
2.6 ozcake flour
-
1.3 ozpotato starch
-
1.3 ozVan Houten Red Cameroon 2224
-
9.0 ozEspresso coffee, freshly made
-
5.3 ozSugar #3
-
2.5 ozCoffee Liqueur
Preparation: Chocolate Ladyfingers
- Place the egg yolks, water and the first quantity of sugar in the mixer and whip for 5-6 minutes or until the mix is light in color.
- Put the flour, cocoa powder and potato starch into a mixing bowl and whisk well.
- Sift the dry mixture on a piece of parchment paper.
- Put the egg whites and the second quantity of sugar into the mixer’s bowl and whisk until stiff peaks form.
- Alternate adding some of the whipped whites and some of the dry mix to the egg yolks and mix well after each addition.
- Place a silpat on the work surface and place the raclette on the short side of the silpat.
- Set your raclette height to 0.8 cm (0.31”).
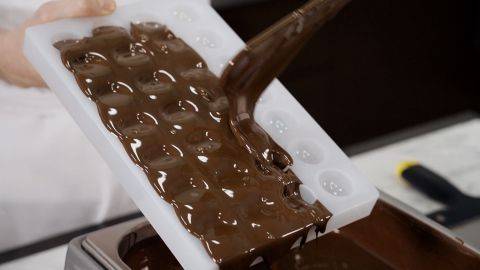
- Pour the dough mix into the raclette and swipe. Alternatively, if you don’t have a raclette, you can spread the dough on the silpat using an offset spatula.
- Bake in a preheated oven at 190°C (375°F) for 8 - 9 minutes or until golden.
- Let it cool completely.
- Whisk the hot espresso and remaining sugar together until the sugar is dissolved.
- Add the coffee liqueur, mix and reserve.
- Flip the sheet of ladyfinger on a parchment paper and then carefully peel the silpat away.
- Use a circular 22 cm (8.7”) ring cutter and cut 2 circles of dough.
- Cover the circles in plastic film and reserve.
View tools
- Metal Tray
- Whisk
- Scraper
- Bowl(s)
- Parchment paper
- Mixing bowl (s)
- Plastic film
- Silpat (s)
- Tabletop mixer, mixing bowl and a whisk
- Raclette
- Spatula(s)
- Sifter
- Ring Cutters
Preparing the Mold
Ingredients: Preparing the Mold
-
Q.S.Cooking Spray
Preparation: Preparing the Mold
- Measure the triangles at the bottom of the silicone mold.
- Cut triangles of the same size in guitar sheet.
- Spray some cooking spray into a bowl.
- Use a small brush to grease the bottom of the silicone mold with the cooking spray.
- Carefully place a plastic triangle on each facet of the mold’s bottom making sure they are equally spaced.
View tools
- Mixing bowl (s)
- Plastic film
- Guitar sheets
- Ruler (s)
- Cutting board
- Silicone mold
- Cutter
Mascarpone Crémeux
Ingredients: Mascarpone Crémeux
-
0.3 ozGelatin 100/120 bloom
-
1.6 ozcold water
-
3.5 ozegg yolks
-
1.8 ozsugar
-
1.8 ozMarsala
-
8.8 ozHeavy Cream 35%
-
8.8 ozMascarpone, whipped
-
1.8 ozglucose syrup
-
2 beans(s)Vanilla beans (piece)
Preparation: Mascarpone Crémeux
- Mix the gelatin and the water and reserve to bloom.
- Place the egg yolks, sugar, marsala and glucose into the pan and mix.
- Slice the vanilla beans lengthwise, scrape the seeds off and add to the pan.
- Whisk well and heat on medium heat, whisking well from time to time. Heat to 82°C (180°F).
- While that is heating, place the marsala and cream into the bowl of the mixer and whip until stiff peaks form.
- Once the egg yolk mix reaches 82°C (180°F), take off the heat and pour into a bowl.
- Add the gelatin to the warm egg yolks mix and blend with an immersion blender until well emulsified.
- Add a little of the whipped mascarpone to the egg yolks mix to lighten it.
- Add the rest of the whipped mascarpone and whisk.
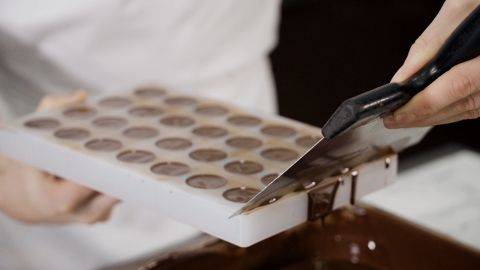
- Pour the crémeux into a piping bag and carefully pipe into the prepared mold.
- Reserve in the blast freezer until needed.
View tools
- Cooktop
- Saucepan
- Metal Tray
- Whisk
- Thermometer
- Immersion blender
- Piping Bag
- Scissors
- Bowl(s)
- Mixing bowl (s)
- Spoon
- Tabletop mixer, mixing bowl and a whisk
- Small pairing knife
- Spatula(s)
Chocolate Cream
Ingredients: Chocolate Cream
-
0.2 ozGelatin 100/120 bloom
-
0.9 ozCold Water
-
8.8 ozHeavy cream 35% fat
-
0.2 ozinstant coffee
-
1.8 ozegg whites
-
3.5 ozsugar
-
1.1 ozwater
Preparation: Chocolate Cream
- Mix the gelatin and the water together in a small bowl.
- Pour the heavy cream and instant coffee into a pan. Heat on medium and whisk well until the coffee is dissolved. Bring to a boil.
- Place the chocolate in a tall recipient.
- Pour the hot cream on the chocolate.
- Mix with an immersion blender until well mixed.
- Add the gelatin and blend until well emulsified.
- Pour into a mixing bowl and cover with plastic film, making
- sure the film touches the surface of the ganache, and reserve.
- Let it cool to 35°C (95°F) - this will be used right away to make the chocolate crémeux.
- Pour the water and sugar into a saucepan and heat on medium heat.
- When the syrup’s temperature reaches 110°C (230°F), start whipping the egg whites on high speed.
- When the syrup’s temperature reaches 118°C (244°F), add it in a slow stream to the whites while the mixer is turning.
- Whip the meringue until soft shiny peaks form.
- Place the ganache on a scale. Add 75g (2.6 oz) of the meringue and fold until well mixed.
- Pour the chocolate cream on top of the mascarpone crémeux in the prepared mold.
- Top with one of the ladyfinger circles and gently tap with your fingertips to place it.
- Baste the ladyfinger biscuit with the coffee.
- Reserve in the blast freezer.
View tools
- Cooktop
- Saucepan
- Whisk
- Tall recipient
- Thermometer
- Immersion blender
- Bowl(s)
- Mixing bowl (s)
- Plastic film
- Scale
- Spoon
- Brush
- Tabletop mixer, mixing bowl and a whisk
- Spatula(s)
Decorations
Ingredients: Decorations
Preparation: Decorations
- For the chocolate strips:
- Pour some pre-crystallized chocolate on the plastic strip and spread out evenly.
- Score the strip horizontally in 2.
- Place the strip of plastic around a 24 cm (9.5”) metal ring and secure with tape.
- Place the larger metal ring around the smaller one to prevent the chocolate strip from moving.
- Place at 16°C (61°F) and reserve.
- For the chocolate triangles:
- Pour some pre-crystallized chocolate on a guitar sheet and cover it with another guitar sheet.
- Use the rolling pin to spread the chocolate into a thin layer.
- Using a ruler, measure one side of the mold’s triangular facets.
- Using a ruler and a sharp knife, trace 4 equidistant lines on the melted chocolate above the guitar sheet.
- With the ruler, measure the other side of the mold’s triangular facets.
- Turn the guitar sheet 90 degrees and trace equidistant lines perpendicular to the first ones. Then trace a diagonal line in each rectangle.
- Place the guitar sheet between two sheets of parchment paper and between two metal trays.
- Place at 16°C (61°F) and reserve.
View tools
- Bowl(s)
- Parchment paper
- Offset spatula
- Guitar sheets
- Ruler (s)
- Rolling pin
- Small paring knife
- Metal Tray (s)
- Tape
- Plastic strip, 2cm x 76 cm (0.8”x30”)
- 25 cm (9.5”) metal ring
- 27 cm (10.2”) metal ring
Assembly
Ingredients: Assembly
-
Q.S.Mona Lisa Gold Powder
-
Q.S.Callebaut Cocoa Butter
Preparation: Assembly
- Unmold the frozen cake carefully.
- Place it immediately on a rotating cake stand for ease of use and to get the best possible result.
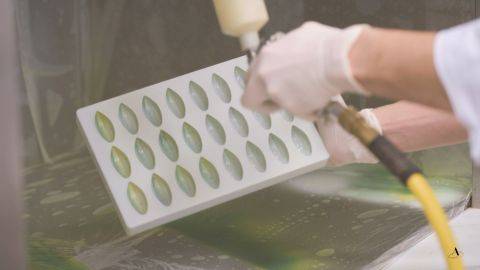
- Mix equal amounts of cocoa butter and melted chocolate and pour into the spray gun. Make sure the mix is fluid and use a heat gun to heat the mix if needed.
- Spray the cake all around with the mix. Keep the same distance from the cake for an even and velvety finish. The velvety finish is obtained by spraying a frozen cake.
- Place the cake on a nice cardboard using a small knife.
- With a small cutter, remove each acetate triangle you had placed on the cake, making sure you get clean lines. If cocoa powder falls on the cream, delicately take it off using a cutter.
- It is best to wait until the cake is defrosted to do the final assembly, so it doesn’t leave moisture on the chocolate decorations.
- Carefully remove the acetate from around the chocolate rings.
- Place one of the two chocolate rings around the cake. Keep the other one for a second cake. This is a good tip for production: you make 2 chocolate cake decorations with one step!
- Cut the chocolate strip to size and secure it to the base of the cake using some melted chocolate in a mini parchment paper cone.
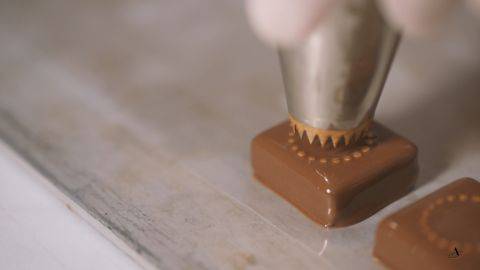
- Using the mini cone, add dots of chocolate on the chocolate triangles. Place them on the cake, alternating on every other facet of the cake to leave one side with the exposed cream. This will secure the chocolate pieces onto the cake. Do this one decoration at a time.
- Place some gold powder and a few chocolate coffee beans in a small glass bowl.
- Cover with plastic wrap and shake until the beans are covered in the gold powder.
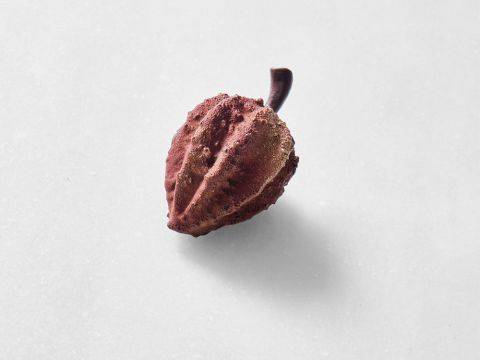
- Using tweezers, place one gold bean in the center of the tiramisu cake.
- Refrigerate for 2 to 3 hours before serving.
View tools
- Bowl(s)
- Parchment paper
- Spray gun
- Plastic film
- Spoon
- Tweezers
- Paper cone
- Cake turntable
- Cake cardboards
- Cutter
- Small knife
- Spatula(s)
- Sifter
Facing Problems with your Creations?
- Find troubleshooting guides & tutorials
- Chat live with an advisor chef and find the right solution to your challenges


Comments
Submitted by fahadilyaschan… on Wed, 01/29/2025 - 08:32
When it comes to hassle-free and luxurious airport transportation, <a href="https://jfklimotaxi.com/" target="_blank">JFK Limo Taxi</a> is the go-to service for travelers. Specializing in providing timely and comfortable rides to and from John F. Kennedy International Airport, their fleet of well-maintained vehicles guarantees a smooth journey. Whether you're heading to the airport or arriving from a long flight, JFK Limo Taxi ensures that your transportation needs are met with professionalism and convenience. With their experienced chauffeurs and competitive rates, you can enjoy peace of mind knowing that you’ll be promptly picked up or dropped off at your destination. Book your ride with <a href="https://jfklimotaxi.com/" target="_blank">JFK Limo Taxi</a> and experience travel like never before.
Submitted by fahadilyaschan… on Wed, 01/29/2025 - 08:31
When it comes to hassle-free and luxurious airport transportation, JFK Limo Taxi is the go-to service for travelers. Specializing in providing timely and comfortable rides to and from John F. Kennedy International Airport, their fleet of well-maintained vehicles guarantees a smooth journey. Whether you're heading to the airport or arriving from a long flight, JFK Limo Taxi ensures that your transportation needs are met with professionalism and convenience. With their experienced chauffeurs and competitive rates, you can enjoy peace of mind knowing that you’ll be promptly picked up or dropped off at your destination. Book your ride with JFK Limo Taxi and experience travel like never before.