
Difficult
Makes: 12 Yield
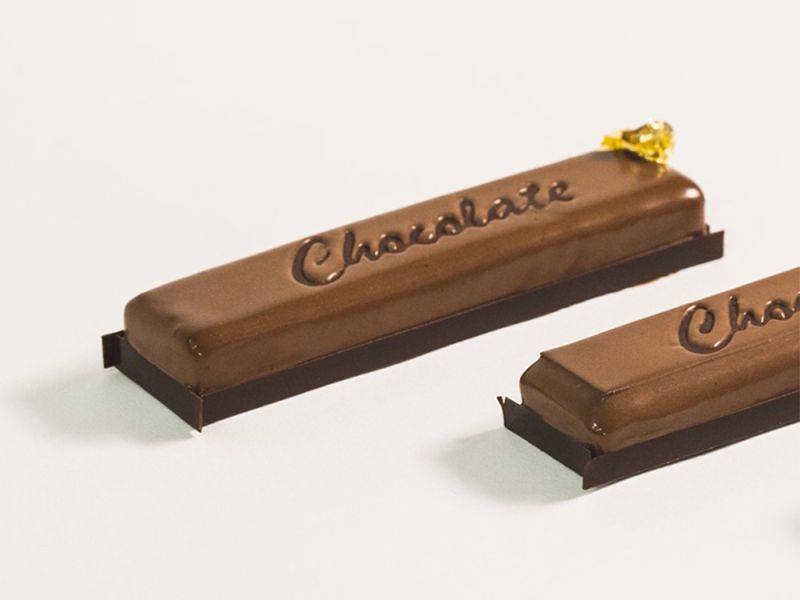
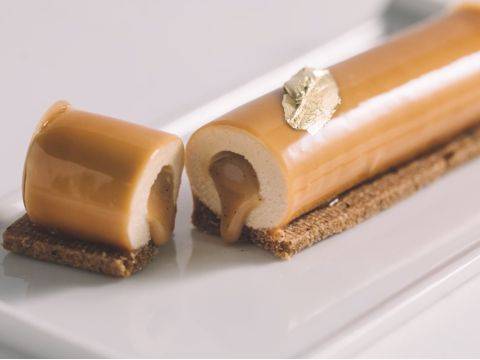
These incredible chocolate boost bars deliver an intense chocolate taste with different textures such as a sablé, mousse, crémeux, sponge cake, and ganache. You will love their flavor as much as their sharp and chic look.These incredible chocolate boost bars deliver an intense chocolate taste with different textures such as a sablé, mousse, crémeux, sponge cake, and ganache. You will love their flavor as much as their sharp and chic look.These incredible chocolate boost bars deliver an intense chocolate taste with different textures such as a sablé, mousse...
- Shelf life:
- 2 days
- Conservation:
- Refrigeration at 4°C
Containing: 9 Components
Chocolate Sablés
Ingredients: Chocolate Sablés
-
6.6 ozbutter
-
1/2 piece(s)vanilla bean
-
1/2 piece(s)orange zest
-
7.9 ozcake flour
-
0.1 ozsalt
-
1.3 ozorange juice
-
2.6 ozsugar
Preparation: Chocolate Sablés
- Chop the chocolate very finely. Note: for a larger production, you can chop the chocolate in a food processor.
- Place most of the butter into the mixer bowl.
- Cut the vanilla bean lengthwise, scrape the seeds and add them to the bowl.
- Zest the orange with a microplane over the mixer bowl.
- Add the rest of the butter to the melted cocoa mass and mix well.
- Add the flour to the mixer bowl and mix on medium speed for a few minutes until the dough comes together.
- In the meantime, add the salt to the orange juice and whisk until the salt is dissolved.
- Add the cocoa mass to the mixer bowl and mix until well incorporated.
- Add the sugar, the orange juice, and the chopped chocolate and mix for a few seconds until well incorporated.
- Pour the dough on a parchment paper and cover with another.
- Roll the dough to a 1.5 mm (0.06") thickness.
- Reserve in the freezer for one hour.
- Once the dough is frozen, slice into 2.5 cm (0.98") by 12.5 cm (4.9")rectangles using a ruler and a knife.
- Bake at 160C°C (320°F)for 12 minutes.
- Let it cool completely then place it in the blast freezer.
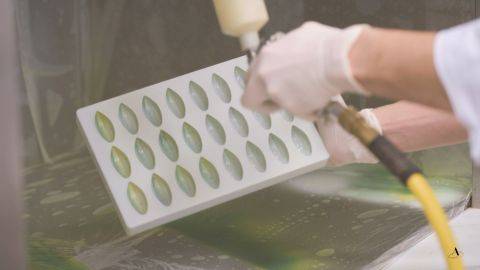
- Mix equal amounts of cocoa butter and melted chocolate and pour into the spray gun. Make sure the mix is fluid and use a heat gun to heat the mix if needed.
- Spray the sablés all around with the mix.
- Reserve in the blast freezer.
View tools
- Metal Tray
- Whisk
- Knife
- Bowl(s)
- Parchment paper
- Spray gun
- Ruler (s)
- Rolling pin
- Silpat
- Small paring knife
- Cutting board
- Microplane
- Tabletop mixer, mixing bowl and a paddle attachment
Chocolate Sponge Cake
Ingredients: Chocolate Sponge Cake
-
1.8 ozMilk 1
-
2.1 ozbutter
-
1/2 piece(s)vanilla bean
-
3.2 ozSugar #1
-
15.4 grsalt
-
2.5 ozcake flour
-
1.4 ozMilk 2
-
3.5 ozEggs, whole
-
4.2 ozeggs yolks
-
0.3 ozbaking powder
-
0.5 ozrum
-
13.1 ozegg whites
-
1.8 ozSugar #2
-
0.3 ozAlbumen
Preparation: Chocolate Sponge Cake
- Put the first quantity of milk, sugar, butter and salt in a saucepan and heat.
- Cut the vanilla bean lengthwise, scrape the seeds and add to the saucepan.
- When the butter is completely melted, add the cocoa mass and mix until it is melted.
- Add the flour and whisk well just until the flour is incorporated.
- Use the spatula to scrape the sides of the dough and press down on it. When the dough separates from the sides of the pan, it's ready.
- Put the dough in the mixer bowl, add the second quantity of milk immediately and mix to cool down the temperature.
- Mix the eggs and the egg yolks together in a small bowl.
- Add half the eggs to the mixer bowl and mix on medium speed until well incorporated.
- Add the rest of the eggs little by little and mix well after each addition.
- Add the baking powder and rum and mix again on medium speed.
- Pour the dough into a food processor and turn it on.
- In the meantime, place the egg whites in the bowl of a tabletop mixer with a whisk attachment and mix on medium speed.
- Mix the second quantity of sugar and the dry egg whites in a bowl.
- After one or two minutes of whipping, add half the dry egg and sugar mix to the whipped egg whites. Add the rest
- Pour the dough into a mixing bowl.
- Add a little of the egg whites to the chocolate mix and mix to lighten it. Add the rest of the whipped whites and fold gently until well mixed.
- Adjust your raplette height to 0.4 cm (0.16").
- Place the silpat on the work surface.
- Place the raplette on the short side of the silpat, pour the dough mix in the raplette and swipe. Alternatively, if you don't have a raplette, you can spread the dough on the silpat with an offset spatula.
- Place the silpat on a metal tray and bake in a preheated 190° C (375°F) oven for 5 minutes.
- Let it cool completely and then place in a blast freezer until frozen.
- Flip the sheet of sponge cake on a parchment paper and then carefully peel the silpat away.
- With a ruler, measure the size of the silicone mold and cut rectangles in the sponge cake.
- Reserve until ready to use.
View tools
- Cooktop
- Saucepan
- Metal Tray
- Whisk
- Knife
- Bowl(s)
- Parchment paper
- Mixing bowl (s)
- Ruler (s)
- Silpat
- Thermomix® or food processor
- Silicone mold
- Spatula
- Tabletop mixer, mixing bowl, a paddle attachment and a whisk
- Raplette
Chocolate Ganache
Ingredients: Chocolate Ganache
-
5.3 ozHeavy cream, 35% fat
-
2.6 ozwater
-
0.7 ozsugar
-
0.9 ozglucose syrup
Preparation: Chocolate Ganache
- Place the cream, water, sugar and glucose in a saucepan and bring to a boil.
- Place the chocolate in a tall recipient.
- Once the cream is boiling, pour it on the chocolate and blend with an immersion blender until emulsified.
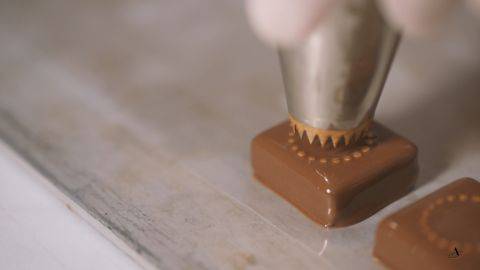
- Pour the ganache in a piping bag.
- Cut a hole in the piping bag and pipe a thin (2 mm/0.08") layer of ganache in the bottom of each mold cavity.
- Place in the blast freezer and reserve.
View tools
- Cooktop
- Saucepan
- Metal Tray
- Tall recipient
- Immersion blender
- Piping Bag
- Scissors
- Bowl(s)
- Silicone mold
- Spatula
Base Cream for Crémeux
Ingredients: Base Cream for Crémeux
-
8.8 ozWhole milk
-
1/2 piece(s)vanilla bean
-
3.5 ozsugar
-
0.7 ozRice starch
-
3.5 ozEgg yolk
Preparation: Base Cream for Crémeux
- Heat the milk in a saucepan.
- Cut the vanilla bean lengthwise, scrape the seeds and add to the saucepan.
- Place the sugar and rice starch in a separate saucepan and mix.
- Add the egg yolks to the sugar mix and whisk well.
- Once the cream is boiling, take it off the heat, add it to the sugar mix and whisk well.
- Place the pot back on the heat and whisk constantly until the cream is thick.
- Use it right away to prepare the chocolate crémeux.
View tools
- Cooktop
- Saucepan
- Whisk
- Bowl(s)
- Spatula
Chocolate Crémeux
Ingredients: Chocolate Crémeux
-
7.1 ozBase cream, warm
Preparation: Chocolate Crémeux
- Place the chocolate in a tall recipient.
- Pour 200g (7oz) of hot base cream on the chocolate and blend with an immersion blender until well emulsified.
- Scrape down the sides of the recipient and blend again.
- Pour the chocolate crémeux in a piping bag.
- Place the silicone mold on a metal tray.
- Pipe some crémeux in the bottom of each mold cavity.
- Top with a rectangle of sponge cake and tap down with your fingertips.
- Pipe more crémeux on the sponge cake layers and smooth it with a spatula.
- Place in the blast freezer until solid.
View tools
- Metal Tray
- Tall recipient
- Immersion blender
- Piping Bag
- Scissors
- Offset spatula
- Scale
- Silicone mold
- Spatula
Chocolate Mousse
Ingredients: Chocolate Mousse
-
4.4 ozBase cream, warm
-
8.8 ozHeavy cream 35% fat
Preparation: Chocolate Mousse
- Place the cream in a mixer bowl and turn it on medium speed.
- In a mixing bowl, mix the melted chocolate (35°C- 95°F) with the warm base cream (35°C- 95°F).
- Mix using an immersion blender until well emulsified and shiny.
- Once the cream is whipped to stiff peaks, add a little to the chocolate mix and blend.
- Add the rest of the whipped cream to the chocolate and fold it gently with a spatula.
- Pour the mousse in a piping bag and cut the tip off.
- Pipe a thin layer of mousse in the mold with the ganache.
- Top with one of the frozen sponge and crémeux rectangles.
- Smooth it out with a spatula and place another shortcake rectangle on top.
- Place in the blast freezer until needed.
View tools
- Metal Tray
- Thermometer
- Immersion blender
- Bowl(s)
- Offset spatula
- Mixing bowl (s)
- Tabletop mixer, mixing bowl and a whisk
- Spatula
- Large Silicone mold
Chocolate Glaze
Ingredients: Chocolate Glaze
-
0.5 ozGelatin powder 200 bloom
-
2.6 ozwater
-
1.0 lbHeavy cream 35% fat
-
1/2 piece(s)vanilla bean
-
1.8 ozsugar
-
2.3 ozinverted sugar
-
2.3 ozGlucose syrop
-
0.9 ozVan Houten Red Cameroon 2224 cocoa powder
-
2.9 oz60-40-41NV
Preparation: Chocolate Glaze
- Mix the gelatin and water together in a bowl. Reserve.
- Put the cream in a saucepan and heat.
- Cut the vanilla bean lengthwise and scrape the seeds into the saucepan.
- Add the sugar, inverted sugar and glucose to the cream. Mix and continue heating.
- Place the chocolate and hazelnut paste in a tall recipient.
- Just before the cream starts boiling, add the cocoa powder and whisk well.
- Pour the boiling cream through a sieve onto the chocolate and hazelnut mix.
- Add the gelatin and blend with an immersion blender until well emulsified.
- Cover with plastic film making sure the film touches the surface of the glaze.
- Place in the refrigerator until ready to use.
View tools
- Cooktop
- Saucepan
- Whisk
- Knife
- Tall recipient
- Immersion blender
- Bowl(s)
- Plastic film
- Spoon
- Spatula
- Sieve
Decorations
Ingredients: Decorations
Preparation: Decorations
For the top decorations:
- Pour the pre-crystallized chocolate on a piece of parchment paper and spread into a thin layer with a rolling pin.
- Wait a few seconds for the chocolate to set and then place the parchment paper, chocolate side down on the guitar sheet and scrape with a metal scraper.
- Remove from the guitar wires and place on your work surface, chocolate side up.
- With a ruler and a sharp knife, measure and cut rectangles the size of your chocolate bars.
- Flip the decorations over on top of another sheet of parchment, and then peel off the original parchment paper carefully.
- Reserve the rectangles at room temperature.
For the outer decorations:
- Pour the pre-crystallized chocolate on a guitar sheet and spread into a thin layer with a rolling pin.
- Wait a few seconds for the chocolate to set and then place the guitar paper chocolate side down on the guitar sheet and scrape with a metal scraper.
- Move the guitar sheet and align the center of the rectangles with the guitar wires and scrape again to cut thinner rectangles.
- Remove the guitar sheet and place the chocolate side down on a metal tray covered with a parchment paper.
- Cover with another metal tray. Reserve at 16°C (61°F) until needed.
View tools
- Metal Tray
- Knife
- Bowl(s)
- Parchment paper
- Guitar cutter
- Ruler (s)
- Rolling pin
- Metal Scraper
- Guitar sheet
Assembly
Ingredients: Assembly
-
Gold leaves
Preparation: Assembly
- Unmold the frozen chocolate bars and place on a rack lined with a tray.
- Warm the top of the bars using a heat gun and place a rectangle of chocolate decoration on it.
- Warm the chocolate decoration with the heat gun and place the stencil in the center of the bar.
- Note: You can use whatever stencil you have on hand or you can make your own. Cover the bar with the chocolate glaze.
- Smooth the top out with a spatula and remove the excess glaze.
- Very carefully remove the stencil with the tip of a cutter.
- Cut strips of chocolate slightly longer than the long side of
- your bars. Place them off centered along the sides of the bars.
- Repeat with the short sides.
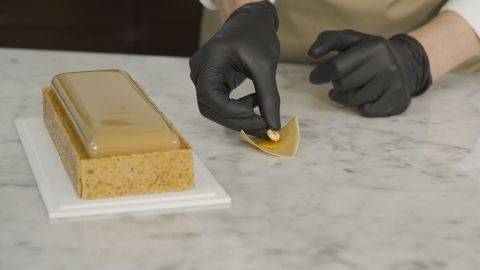
- Use tweezers to place some gold leaves on one of the bars.
- Allow the bars to thaw completely before serving.
View tools
- Metal Tray
- Knife
- Heat gun
- Ruler (s)
- Rack
- Tweezers
- Small offset spatula
- Cutter
- Stencil
Facing Problems with your Creations?
- Find troubleshooting guides & tutorials
- Chat live with an advisor chef and find the right solution to your challenges


Comments