

Medium
Makes: 40
-
Timeless Classics
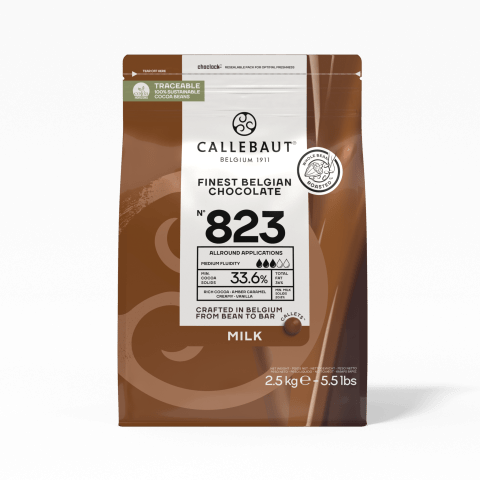
The creaminess of Callebaut 823 pairs beautifully with the indulgent salted caramel and crunchy peanut filling.The creaminess of Callebaut 823 pairs beautifully with the indulgent salted caramel and crunchy peanut filling.
- Shelf life:
- 6 Weeks
- Conservation:
- Between 8ºC - 16ºC
Containing: 6 Components
Honey Roasted Peanuts
Ingredients: Honey Roasted Peanuts
-
1.1 ozSugar
-
1.2 ozWater
-
1.8 ozHoney
-
13.5 ozPeanuts, roasted
-
Q.S.Callebaut Mycryo
Preparation: Honey Roasted Peanuts
- Bring the sugar, water and honey to the boil.
- Remove the syrup from the heat and cool completely in the fridge.
- Remove from the fridge and directly pour onto the toasted peanuts.
- Spread the peanuts onto a metal tray lined with a silicon mat.
- Caramelize the preparation in the oven at 160°C (320°F), tossing frequently until a golden caramel color is achieved.
- Remove from the oven, sprinkle some Mycryo® on top and stir as the peanuts cool down. The cocoa butter will prevent the peanuts from sticking to one another.
- Set aside at room temperature.
View tools
- Cooktop
- Saucepan
- Metal Tray
- Silicon mat
- Whisk
- Spatula(s)
Salted Caramel
Ingredients: Salted Caramel
-
7.1 ozHeavy Cream 35%
-
0.1 ozMadagascar vanilla bean
-
0.1 ozFleur de sel
-
5.3 ozSugar
-
1.8 ozglucose syrup DE 38
-
3.5 ozButter
Preparation: Salted Caramel
- Scrape the vanilla seeds out of the beans and place both the bean and the seeds into the saucepan.
- Add the heavy cream, vanilla and salt and bring to the boil.
- Remove from the heat and set aside.
- Heat up the pan and dry caramelize the sugar little by little. Wait for the sugar to completely dissolve before adding the next addition of sugar.
- Once the sugar has completely caramelized, add the glucose syrup and continue heating until obtaining a deep caramel. Pre-heat the glucose syrup in the microwave to quicken the caramelization process.
- Mix the glucose well into the caramel.
- Deglaze by adding ¾ of the butter into the saucepan and mix until completely smooth.
- Continue deglazing by adding the heavy cream mixture little by little into the saucepan while continuously stirring.
- Bring the whole preparation to the boil and cook to 106°C (223°F).
- Remove from the heat and allow the caramel to slightly cool down.
- Strain the vanilla beans out of the caramel into a tall recipient and add the remaining butter.
- Blend well using an immersion blender, transfer into a bowl and cover with plastic wrap.
- Let the mixture cool down to room temperature. This usually takes 24 hours.Transfer the mixture into a piping bag, cut a small tip to control the flow and fill the prepared milk chocolate molds within 1 mm (0.039”) from the top.
- Tap the molds on the table to ensure that the filling is evenly spread in the molds.
- Place in the refrigerator for 15 minutes to promote the crystallization of the filling.
- After 15 minutes, remove from the refrigerator and allow to fully crystallize at 18-20°C (64-68°F) for at least 12 hours and preferably overnight.
View tools
- Cooktop
- Saucepan
- Knife
- Tall recipient
- Strainer
- Thermometer
- Immersion blender
- Microwave
- Scissors
- Bowl scraper
- Scraper
- Microwave piping bag
- Spatula(s)
Molding
Ingredients: Molding
-
Q.S.Mona Lisa Power Flower - Red
Preparation: Molding
- Using a heat gun, slightly warm the top of the mold to barely melt the chocolate shells so that when we close the mold with the pre-crystallized chocolate, the two will join together perfectly.
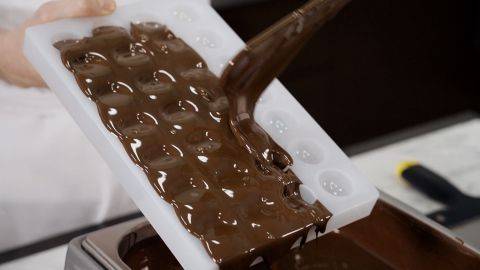
- With a spoon, pour pre-crystallized milk chocolate onto the mold and tap it on the table to remove any air bubbles and to make sure that it is completely filled.
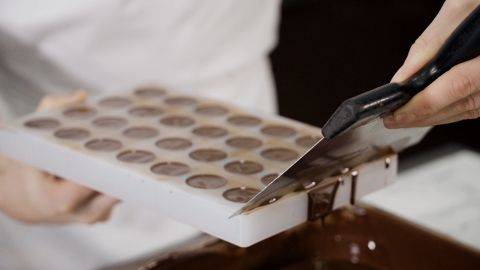
- Remove the excess chocolate and clean well with a scraper.
- Tap again to flatten the surface of the bars.
- Place the molds on a metal tray lined with parchment paper and put in the refrigerator for 15-20 minutes to promote the crystallization.
- Remove from the fridge and slightly flex the mold to start unmolding.
- Cover the mold with parchment paper and a metal tray, flip the trays over and tap the mold with a spatula. Carefully lift the molds. If any bars remain in the mold, repeat the same process.
- After unmolding, handle the bars with soft cotton gloves to prevent fingerprints.
View tools
- Metal Tray
- Scraper
- Parchment paper
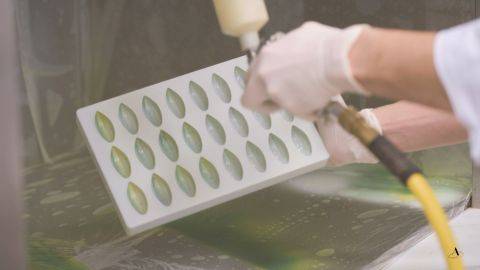
- Spray gun
- Soft cloth
- Melting kettle or automatic tempering machine
- Cacao Barry log snacking bar
Pre-Assembly
Ingredients: Pre-Assembly
-
1.9 ozPeanuts, roasted
Preparation: Pre-Assembly
- Transfer the caramel into a piping bag and cut a small tip to control the flow.
- Pipe the caramel into the molds to 1/3 full and place some roasted peanuts into the caramel, making sure to press them down
View tools
- Piping Bag
- Scissors
Peanut Praline
Ingredients: Peanut Praline
-
5.3 ozRoasted peanut paste
-
1.9 ozPeanuts, roasted and lightly crushed
-
1.4 ozCallebaut Cocoa Butter
-
1.9 ozcallebaut pailleté feuilletine
Preparation: Peanut Praline
- Melt the milk chocolate gianduja and the cocoa butter together in the microwave for 30 seconds at a time at high power. Stir and place back in the microwave for an additional 30 seconds. The finale temperature of the mixture should be 40°C (104°F).
- Add the peanut paste to the melted gianduja mixture.
- Transfer the Pailleté Feuilletine™ into a piping bag, lightly crush it using a rolling pin and place back into a bowl.
- Pre-crystallize the gianduja mixture on the marble to 25-26°C (77-79°F).
- To check whether the crystallization process has been completed correctly: dip a piece of paper into the mixture and place the paper into the refrigerator for 3-5 minutes. If the mixture solidifies on the paper, then the mix has been well crystallized. However, if it has not set after 5 minutes, further crystallize on the table.
- Mix the pailleté Feuilletine™ and the gianduja together.
- Transfer the mixture into a piping bag and pipe over the peanut layer into the mold, leaving at least 1 mm (0.04”) at the top.
- Tap the molds on the table to ensure that the filling is evenly spread in the molds.
- Place in the refrigerator for 15 minutes to promote the crystallization of the filling.
- After 15 minutes, remove from the refrigerator and allow to crystallize fully at 18-20°C (64-68°F) for at least 12 hours and preferably overnight.
View tools
- Microwave
- Piping Bag
- Scissors
- Scraper
- Mixing bowl (s)
- Palette knife
- Rolling pin
- Spatula(s)
Final Assembly
Ingredients: Final Assembly
-
Q.S.Peanuts, roasted
Preparation: Final Assembly
- Using a heat gun, slightly warm the top of the mold to barely melt the chocolate shells to ensure that the two will join together perfectly when closing the mold with the pre-crystallized chocolate.
- Use a spoon to pour pre-crystallized milk chocolate into the mold.
- Remove the excess chocolate with a palette knife and take the chocolate off the mold little by little, starting from the middle of the mold. Doing so will prevent the mold from getting too dirty and having too much chocolate on the sides.
- Tap the molds on the table to remove the air bubbles and to make sure that the molds are evenly filled.
- With a scraper, remove the excess and clean the mold well.
- Tap again to flatten the surface of the bars.
- Place the molds on a metal tray lined with parchment paper and put in the refrigerator for 15-20 minutes to promote the crystallization.
- Remove from the fridge and start unmolding by slightly flexing the molds.
- Cover the molds with parchment paper and a metal tray. Flip the trays over and tap the mold with a spatula. Carefully lift the molds. Repeat the same process if any bars remain in the mold.
- Place the bars onto a wire rack using gloved hands to prevent fingerprints.
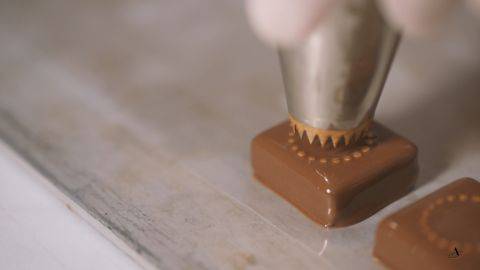
- Pour pre-crystallized milk chocolate into a paper cone and pipe some onto the surface of the bar, creating lines.
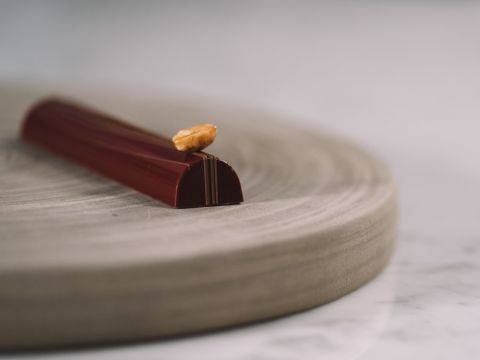
- Finish by placing a honey roasted peanut on top of each bonbon.
View tools
- Metal Tray
- Scraper
- Parchment paper
- Melting kettle or automatic tempering machine
- Heat gun
- Palette knife
- Spoon
- Paper cones
Facing Problems with your Creations?
- Find troubleshooting guides & tutorials
- Chat live with an advisor chef and find the right solution to your challenges


Comments