

Difficult
Makes: 12
-
Good to go
Step up your brownie game with this exquisite modern version. Pairing the mellow cocoa flavor of the brownie with a pecan-orange caramel and Gold Chocolate whipped ganache creates an incredible flavor and texture experience. This is a brownie worthy of silverware!Step up your brownie game with this exquisite modern version. Pairing the mellow cocoa flavor of the brownie with a pecan-orange caramel and Gold Chocolate whipped ganache creates an incredible flavor and texture experience. This is a brownie worthy of silverware!Step up your brownie game with this exquisite modern version. Pairing the mellow cocoa flavor of the brownie with a peca...
- Shelf life:
- 3 days
- Conservation:
- Refrigeration at 4°C
Containing: 12 Components


Croustillant
Ingredients: Croustillant
-
1.8 ozButter softened
-
2.2 ozlight brown sugar
-
2.2 ozAll purpose flour
Preparation: Croustillant
- In a tabletop mixer equipped with a paddle attachment, mix together the butter, brown sugar, and flour at medium speed to reach a texture that holds well together.
- Place the croustillant on a Silpat and flatten it slightly. Add a second Silpat on top and roll with a rolling pin to a thickness of 1 mm (0.04”).
- Place on a metal tray and put it in a freezer until cold, about 30 minutes.
- Once cold, place the croustillant on a metal tray lined with parchment paper and cut squares of 3 cm x 3 cm (0.4” x 0.4”) using a knife.
- Place the croustillant back in the freezer for about 5 minutes to let the squares to set.
View tools
- Knife
- Scraper
- Bowl(s)
- Parchment paper
- Ruler (s)
- Rolling pin
- Metal Tray (s)
- Silpat (s)
- Tabletop mixer, mixing bowl and a paddle attachment
- Spatula(s)
CHOUX PASTRY
Ingredients: CHOUX PASTRY
-
7.1 ozButter 82% fat
-
7.1 ozWhole milk
-
7.1 ozwater
-
0.3 ozsugar
-
0.3 ozsea salt
-
7.2 ozall-purpose flour
-
14.1 ozEggs, whole
Preparation: CHOUX PASTRY
- Pour the butter, milk, water, sugar, and salt into a saucepan and bring to a boil.
- Once boiling, turn off the heat, add the flour, and mix vigorously until well incorporated.
- Turn the heat back on and keep mixing until the texture has thickened.
- Pour the mixture into a tabletop mixer with a paddle attachment and mix at low speed in order to cool down the choux pastry.
- The choux pastry should be at 60°C (140°F) or less in order not to cook the eggs when we add them.
- Once below 60°C (140°F), add the eggs in 3 additions and continue mixing on medium speed.
- Scrape the mixing bowl to make sure the choux pastry is homogenous.
- Pour the preparation into a piping bag with an 8 mm (0.3”) tip.
- Pipe small dots of choux pastry onto a metal tray lined with a silpain.
- Take the croustillant squares out of the freezer and, using a small offset spatula, place 1 square on top of the choux pastry dot.
- Bake at 180°C (356°F) for 25 minutes, making sure to reduce the air flow.
- Once baked, place the choux pastry on a metal tray lined with parchment paper and reserve at room temperature until needed.
View tools
- Cooktop
- Saucepan
- Thermometer
- Scissors
- Bowl(s)
- Parchment paper
- Small offset spatula
- Silpain
- Metal Tray (s)
- Tabletop mixer, mixing bowl and a paddle attachment
- Piping bag & 8 mm (0.3”) tip
- Spatula(s)
BROWNIE BASE
Ingredients: BROWNIE BASE
-
7.3 ozButter 82% fat
-
5.7 ozsugar
-
5.7 ozDark brown sugar
-
4.1 ozall-purpose flour
-
2.2 ozpotato starch
-
0.1 ozsea salt
-
8.1 ozWhole eggs, at 18- 20°C (64-68°F)
-
1.8 ozCacao Barry Plein Arome Cocoa Powder
Preparation: BROWNIE BASE
- Melt together the butter and chocolate in the microwave in 30 seconds bursts. Mix well using a spatula, until all the chocolate is melted.
- Add the dry ingredients and whisk well between each addition. Potato starch will cut the gluten strength and give a smooth texture to the brownie.
- Then, add the eggs at the end. Whisking by hand is better as it prevents incorporating too much air in the preparation and therefore ends up with a light texture that will dry out. Brownies should be dense and moist.
- Place the batter into a piping bag.
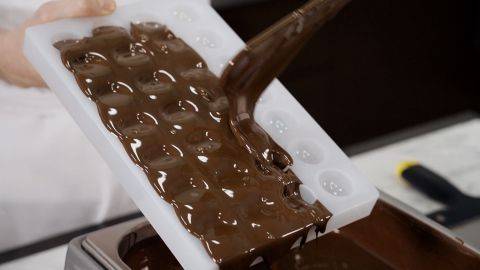
- Pipe into the molds and fill about halfway.
- Place a choux pastry in the brownie batter in each mold cavity and gently press to slightly push the choux inside the batter.
- Place a silpain on top of the mold for baking to avoid the choux from rising.
- Bake at 160°C (320°F) for 15 minutes.
- Once baked, place the brownies in the freezer for about 1 hour so that they do not stick to the mold when unmolding.
- Unmold the brownies and place them on a metal tray lined with parchment paper.
- Put back into the freezer until needed.
View tools
- Whisk
- Microwave
- Piping Bag
- Scissors
- Bowl(s)
- Parchment paper
- Mixing bowl (s)
- Silpain
- Metal Tray (s)
- Demarle Mold FP 1331 - Puck - ø 45/66 mm
- Spatula(s)
DIPPING GLAÇAGE
Ingredients: DIPPING GLAÇAGE
-
1.2 lbCHM-Q415AR
-
3.1 ozGrapeseed oil
-
0.8 ozglaze
Preparation: DIPPING GLAÇAGE
- Warm up the chocolates with the grapeseed oil in a microwave for about 2 minutes. The oil gives the chocolate a smoother texture and helps avoid cracking.
- Once the chocolate mixture is melted, add the hazelnut pieces and mix well.
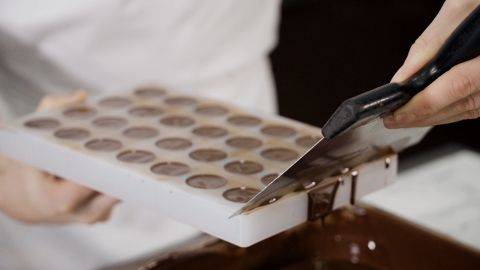
- Take the brownie out of the freezer and, using a knife, dip the sides of the brownie into the chocolate.
- Once dipped, place back onto the metal tray lined with parchment paper.
- Reserve in the refrigerator until needed.
View tools
- Knife
- Microwave
- Bowl(s)
- Mixing bowl (s)
- Small offset spatula
- Spatula(s)
CARAMEL PECAN
Ingredients: CARAMEL PECAN
-
2.3 ozpecans
-
1.0 lbHeavy cream, 35% fat
-
0.1 ozsea salt
-
0.4 ozCornstarch
-
0.1 ozbaking soda
-
0.4 ozorange zest
-
3.2 ozglucose syrup DE 40
-
1.0 lbsugar
-
3.2 ozbutter
Preparation: CARAMEL PECAN
- Pour the pecans into the thermomix and mix well until obtaining a smooth pecan nut paste.
- Pour the paste into a bowl.
- With the heat off, whisk into the cream the salt, cornstarch, baking soda, and orange zest.
- Bring it to the boil.
- Once boiling, remove from the heat.
- In another saucepan, warm up the glucose syrup and then add the sugar while mixing with a spatula. Wait for the sugar to melt and be almost liquid before adding more sugar.
- Continue heating until the mixture’s color is golden brown.
- Once brown, lower the heat and slowly add the cream mixture, whisking well.
- Once well incorporated, remove from the heat and pour into a mixing bowl.
- Add the butter and the pecan paste into the preparation and mix well using an immersion blender until it is well emulsified.
- Pour the caramel into a piping bag with a 6 mm (0.2”) round tip.
- Reserve at room temperature until needed.
View tools
- Cooktop
- Whisk
- Immersion blender
- Scissors
- Bowl(s)
- Mixing bowl (s)
- Saucepans
- Thermomix® or food processor
- Piping bag 6 mm (0.2”) round tip
- Spatula(s)
MILK CHOCOLATE GLAÇAGE
Ingredients: MILK CHOCOLATE GLAÇAGE
-
5.9 ozwater
-
5.7 ozglucose syrup DE 40
-
7.1 ozisomalt
-
7.1 ozsugar
-
4.4 ozGelatin mass (1:5 gelatin powder 200 bloom + water)
-
4.7 ozsweetened condensed milk
-
3.5 ozClear nappage
-
15.4 grgold powder
Preparation: MILK CHOCOLATE GLAÇAGE
- On medium heat, warm up the water, glucose syrup, isomalt, and sugar to 105°C (221°F) and mix well.
- It is important to add the water and glucose syrup into the saucepan first to prevent the sugar from caramelizing on the bottom of the saucepan.
- Once at 105°C (221°F), remove from the heat.
- Pour the mixture into a tall recipient.
- Add the gelatin mass and the chocolates and mix well using an immersion blender.
- Add the condensed milk, clear nappage, and powder. Mix again until well emulsified.
- Cover with plastic film, making sure it touches the whole surface of the glacage, and put in the refrigerator until needed.
View tools
- Cooktop
- Saucepan
- Whisk
- Tall recipient
- Thermometer
- Immersion blender
- Bowl(s)
- Plastic film
- Spoon
- Spatula(s)
WHIPPED GANACHE
Ingredients: WHIPPED GANACHE
-
3.6 ozWhole milk
-
2.3 oztrimoline
-
1 beans(s)vanilla bean
-
0.3 ozGelatin mass (1:5 gelatin powder 200 bloom + water)
-
1.5 lbHeavy cream, 35% fat
Preparation: WHIPPED GANACHE
- Pour the milk and trimoline into a mixing bowl.
- Cut the vanilla bean, scrape the vanilla seeds and add to the mixture.
- Place in a microwave for around 40 seconds, until the mixture is hot.
- Add the gelatin mass and the Gold chocolate and mix well until the chocolate is completely melted.
- Add the cream and mix until well emulsified.
- Cover with plastic film on top of the ganache and let it set overnight in a refrigerator.
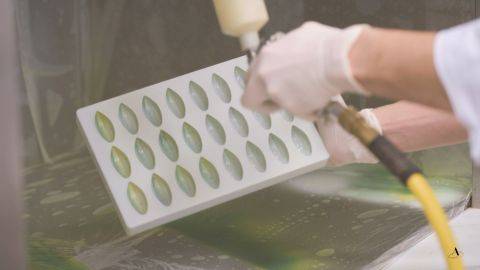
- Once set, remove the plastic film and whip up the ganache in a tabletop mixer equipped with a whisk until it holds soft peaks.
- Pour the ganache into a piping bag, cut a tip-off, and pipe the ganache onto the demi-sphere molds, filling each cavity completely.
- Using an offset spatula, flatten the tops evenly.
- Put in the freezer for about 2 hours or overnight for the ganache to be very cold.
View tools
- Metal Tray
- Knife
- Immersion blender
- Microwave
- Piping Bag
- Scissors
- Scraper
- Bowl(s)
- Offset spatula
- Mixing bowl (s)
- Plastic film
- Demi-sphere mold 1490
- Tabletop mixer, mixing bowl and a whisk
MILK CHOCOLATE MOUSSE
Ingredients: MILK CHOCOLATE MOUSSE
-
3.9 ozWhole milk
-
3.9 ozHeavy Cream, 35% fat #1
-
0.8 ozsugar
-
1.7 ozegg yolks
-
1.1 ozGelatin mass (1:5 gelatin powder 200 bloom + water)
-
14.0 ozHeavy cream, 35% fat #2, lightly whipped
Preparation: MILK CHOCOLATE MOUSSE
- Pour the milk, first quantity of cream and sugar into a bowl and slightly whisk.
- Add the egg yolks and whisk well.
- Warm up in the microwave for 25 seconds, whisk a little bit and then warm up for 25 seconds again. Whisk and warm up again, if needed, until the temperature of the mixture reaches 82°C (180°F).
- Add the chocolate and gelatin mass and whisk well. Warm up for 10 seconds and whisk until all chocolates are completely melted.
- The temperature should be between 35 -40°C (95-104°F).
- Add some of the whipped cream and slightly start to fold it into the mousse and then add the rest of the cream and fully incorporate. The mass should be homogenous and the texture smooth.
- Pour the mousse into a piping bag.
- Cut a tip-off and pipe some mousse into the bottom of the demi sphere mold.
- Place in the freezer for 5 minutes. Freezing the bottom before adding more mousse, will allow the whipped ganache insert not to reach the bottom of the mold.
- After 5 minutes, pipe more chocolate mousse into the molds, filling about half of the mold.
- Insert a frozen whipped ganache demi sphere in the mousse and gently press until the mousse and ganache are leveled.
- Pipe some more chocolate mousse on top to cover the entire surface. Flatten it out using an offset spatula.
- Place in the freezer until set.
View tools
- Metal Tray
- Whisk
- Tall recipient
- Thermometer
- Microwave
- Piping Bag
- Scissors
- Bowl(s)
- Offset spatula
- Gloves
- Mixing bowl (s)
- Demi sphere mold ( 6 cm (2.4”)diameter)
- Spatula(s)
CHOCOLATE DECORATIONS
Ingredients: CHOCOLATE DECORATIONS
Preparation: CHOCOLATE DECORATIONS
- Roll a guitar sheet around the tube and cut once the sheet has the size of the tube.
- Pour some pre-crystallized chocolate on the guitar sheet and spread it out to a thin layer using an offset spatula, the whole surface of the guitar sheet should be covered.
- Let it set for a few minutes.
- Place the sheet with chocolate on a guitar cutter and, using a scraper, cut stripes of 1 cm (0.4”).
- Roll the guitar sheet around the tube, cover it with plastic film, and put it in the refrigerator at 16°C (61°F) for 1-hour minimum.
- Carefully remove the plastic film from the tube using an X-acto.
- Carefully remove the tube, remove the guitar sheet and place the chocolate circles onto a metal tray lined with parchment paper.
- Reserve in the refrigerator until needed.
View tools
- Metal Tray
- Knife
- Scraper
- Parchment paper
- Offset spatula
- Mixing bowl (s)
- Plastic film
- Guitar cutter
- Guitar sheets
- Tube
- Exacto knife
CHOCOLATE DISCS
Ingredients: CHOCOLATE DISCS
Preparation: CHOCOLATE DISCS
- Pour some pre-crystallized chocolate on a guitar sheet.
- Place another guitar sheet on top and spread evenly in a thin layer using a tube.
- Turn the guitar sheet over so that both sides can cool down.
- Using a 4.6 cm (1.6”) ring cutter, cut out some circles.
- Place the chocolate discs onto a metal tray and cover them with a second metal tray.
- Place in the refrigerator for at least 1 hour at 16°C (61°F).
- Once the chocolate discs are set, remove the plastic sheet, flip over and remove the other side.
- Using a small offset spatula, place the chocolate discs on a metal tray lined with parchment paper.
- Reserve in the refrigerator at 16°C (61°F) until needed.
View tools
- Bowl(s)
- Parchment paper
- Guitar sheets
- Small offset spatula
- Tube
- Ring Cutter 4.6 cm (1.8")
- Metal Tray (s)
CHOCOLATE STAMPS
Ingredients: CHOCOLATE STAMPS
Preparation: CHOCOLATE STAMPS
- Spray some cooling spray onto the stamp to freeze it.
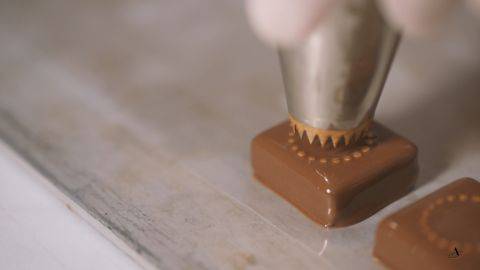
- Pour some pre-crystallized chocolate into a paper cone and cut a small tip off.
- Pipe some dots of chocolate on a metal tray lined with a guitar sheet and apply the stamp onto it.
- Place in the refrigerator at 16°C (61°F) for 1 hour.
View tools
- Stamp (s)
- Scissors
- Guitar sheets
- Metal Tray (s)
- Paper cone
- Cooling spray
ASSEMBLY
Ingredients: ASSEMBLY
Preparation: ASSEMBLY
- Pipe some pecan caramel inside the choux pastry to fill them completely.
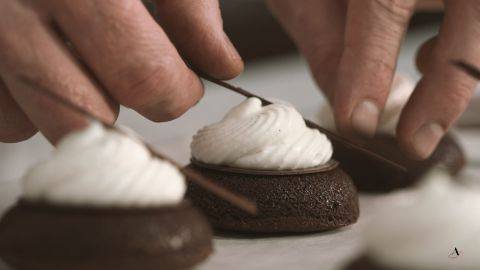
- Using an offset spatula, place a disc of chocolate on top of the brownie and reserve it in the refrigerator until needed.
- Warm up the milk chocolate glaçage so that its temperature is around 30 -35°C (86- 95°F) and mix using an immersion blender until well emulsified.
- Place the chocolate mousse demi sphere onto a rack and glaze them.
- Using a small offset spatula, slightly remove the excess chocolate from the bottom and place it on top of the brownie.
- Place a chocolate decoration around the demi sphere of mousse.
- Depending on the size of your ring, you might have to stick the ring with a dot of pre-crystallized chocolate and use some cold spray to fix it.
- Using a paper cone, pipe a dot of chocolate on a chocolate stamp and stick it to the chocolate ring.
View tools
- Metal Tray
- Thermometer
- Immersion blender
- Microwave
- Offset spatula
- Gloves
- Rack
- Small offset spatula
- Paper cone
- Cooling spray
Facing Problems with your Creations?
- Find troubleshooting guides & tutorials
- Chat live with an advisor chef and find the right solution to your challenges


Comments