
Medium
Makes: 20
-
Timeless Classics
-
Quick & easy (production)
-
Good for freezing
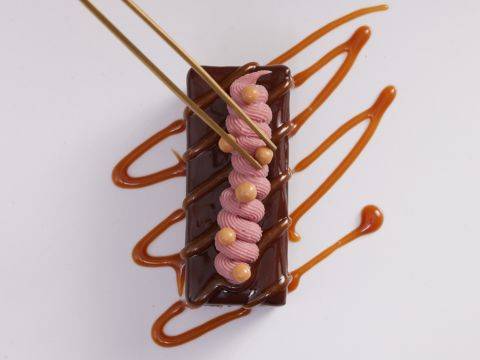
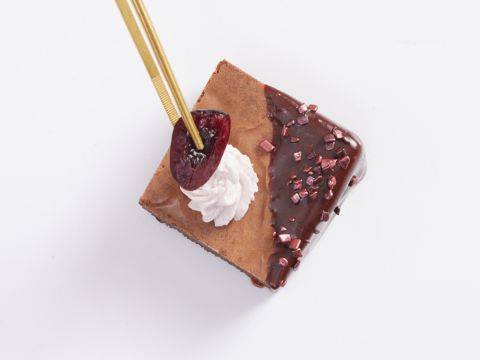
The base mix for these brownies uses Callebaut® 811 - a classic couverture for a classic bakery item. 811's rich, smooth cocoa notes make it ideal for brownies. The light vanilla whipped cream contrasts beautifully with the creamy caramel and rich chocolate.The base mix for these brownies uses Callebaut® 811 - a classic couverture for a classic bakery item. 811's rich, smooth cocoa notes make it ideal for brownies. The light vanilla whipped cream contrasts beautifully with the creamy caramel and rich chocolate.The base mix for these brownies uses Callebaut® 811 - a classic couverture for a classic bakery item. 811's rich, smooth...
- Shelf life:
- 2 Days
- Conservation:
- Refrigeration at 4ºC
Containing: 6 Components
Base Brownie Mix
- Melt together the butter and chocolate in the microwave in 30 seconds bursts. Mix well using a spatula, until all the chocolate is melted.
- Add the dry ingredients and whisk well between each addition.
- Then, add the eggs at the end.
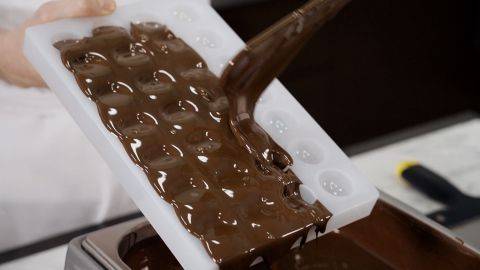
- Place the batter into a piping bag.
- Pipe into the molds and bake at 160°C (320°F) for 12 minutes.
- Once baked, place them in the freezer until completely cold, for about 30 minutes.
- Once cooled, unmold the brownies and place them on a metal tray lined with parchment paper.
- Place in the refrigerator and reserve for the assembly.
View tools
- Metal Tray
- Whisk
- Microwave
- Piping Bag
- Scissors
- Bowl(s)
- Parchment paper
- Gloves
- Mixing bowl (s)
- Demarle Mold
- Spatula(s)
Caramel Cream
- Place the cream and the trimoline into a mixing bowl and warm in the microwave for around 55 seconds. Trimoline is great to give extra smoothness to the caramel and to prevent sugar from crystallizing.
- Add the Gold chocolate and the 811 dark chocolate and mix well.
- Warm for another 30 seconds in the microwave and mix again until all chocolates have melted (the temperature should not be over 40°C (104°F)).
- Place the mixture into a tall recipient.
- Add the butter and mix well using an immersion blender until well emulsified.
- Place the caramel cream into a piping bag and reserve at room temperature.
View tools
- Tall recipient
- Immersion blender
- Microwave
- Piping Bag
- Bowl(s)
- Mixing bowl (s)
- Spatula(s)
Whipped Ganache
- Place the milk and the trimoline into a mixing bowl.
- Cut the vanilla bean, scrape the vanilla seeds off and add to the milk and trimoline mixture.
- Warm up in the microwave for about 40 seconds.
- Add the white chocolate and mix well.
- Warm up in the microwave for about 25 seconds, mix again until the chocolate is completely melted.
- Add the gelatin mass and mix using an immersion blender.
- Add the cream to the mixture and mix again until well emulsified.
- Cover with a plastic film and place in the refrigerator. Leave the ganache to set overnight.
- Before assembly, place the cream in a tabletop mixer with a whisk and whip until it holds soft peaks.
- Place into a piping bag equiped with a 13 mm (0.5”) tip (lightly flutted) and use for the assembly.
View tools
- Whisk
- Knife
- Immersion blender
- Microwave
- Scissors
- Scraper
- Bowl(s)
- Mixing bowl (s)
- Tabletop mixer
- Piping bag and a 13 mm (0.5") tip, lightly fluted
- Spatula(s)
Chocolate Discs
- Pour some pre-crystallized chocolate on a guitar sheet.
- Place another guitar sheet on top and spread evenly in a thin layer using a tube.
- Turn the guitar sheet over so that both side can cool down.
- Using a 4.6 cm (1.8”) ring cutter, cut out some circles.
- Place the chocolate discs onto a metal tray and cover with a second metal tray.
- Place in the refrigerator for at least 1 hour at 16°C (61°F).
- Once the chocolate discs are set, remove the plastic sheet, flip over and remove the other side.
- Using a small offset spatula, place the chocolate discs on a metal tray lined with parchment paper.
- Reserve in the refrigerator at 16°C (61°F) until needed.
View tools
- Metal Tray
- Bowl(s)
- Parchment paper
- Guitar sheets
- Small offset spatula
- Tube
- Ring Cutter 4.6 cm (1.8")
Chocolate Shavings Decorations
- Pour some pre-crystallized chocolate on the marble table.
- Using a spatula, spread it out evenly to form a thin layer.
- Let crystallize for a few minutes until the chocolate is almost solid.
- Using a spatula, delicately scrape the chocolate layer and spread the decorations out onto a metal tray lined with a Silpat.
- Place in the refrigerator for at least one hour at 16°C (61°F).
View tools
- Metal Tray
- Offset spatula
- Metal Scraper
- Bowl (s)
- Silpat (s)
Assembly
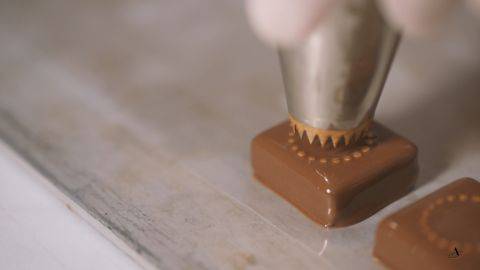
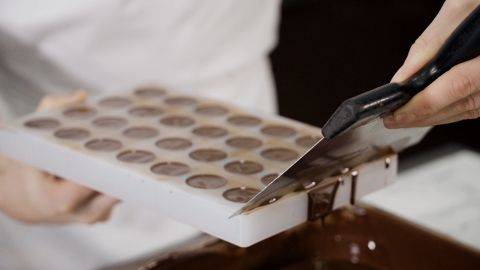
- Cut a tip off the piping bag with the caramel cream and pipe some caramel to fill completely the brownies’ cavities.
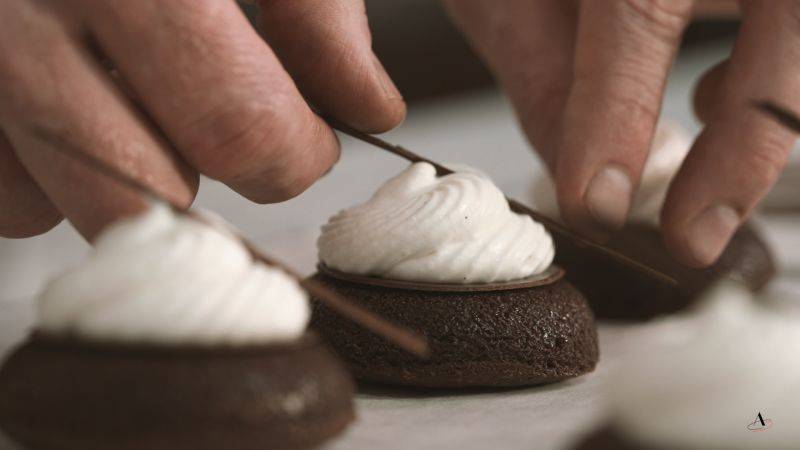
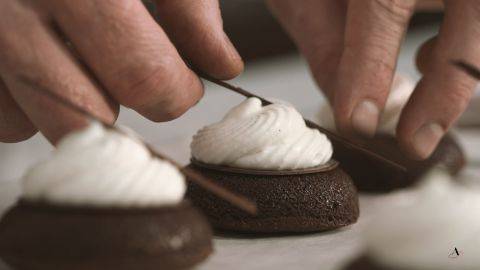
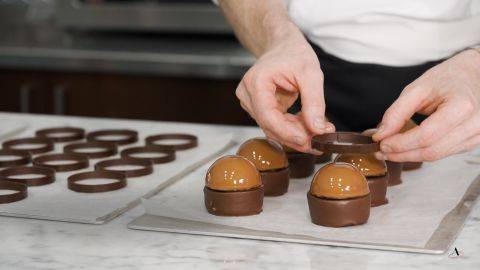
- Place a disc on top of the brownie using an offset spatula.
- Pipe some whipped ganache on top of the chocolate disc.
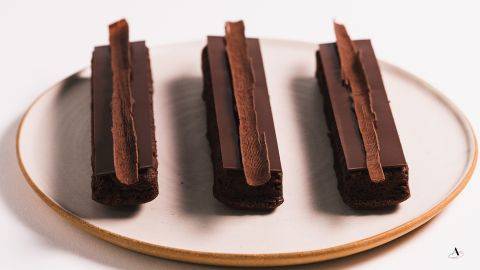
- Place a thin line of the shaving decoration on top of each brownie to decorate.
- Keep in the refrigerator.
View tools
- Scissors
- Offset spatula
Facing Problems with your Creations?
- Find troubleshooting guides & tutorials
- Chat live with an advisor chef and find the right solution to your challenges


Comments