

Medium
Makes: 40
-
Good for freezing
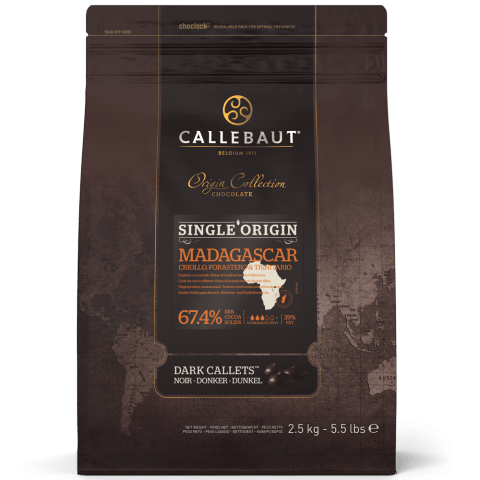
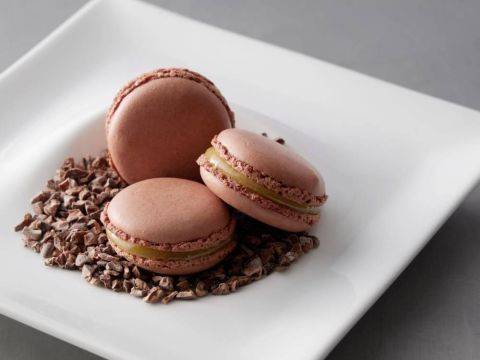
Petit gâteau macaron à la Saint Honoré, combining the intense notes of a Madagascar single origin dark chocolate ganache with the tropical flavors of the whipped cream and the crémeux made with pineapple and coconut. Two classics of French pastry into one: your customers won’t resist.Petit gâteau macaron à la Saint Honoré, combining the intense notes of a Madagascar single origin dark chocolate ganache with the tropical flavors of the whipped cream and the crémeux made with pineapple and coconut. Two classics of French pastry into one: your customers won’t resist.Petit gâteau macaron à la Saint Honoré, combining the intense notes of a Madagascar single origin dark chocolate ganache...
- Shelf life:
- 6 Weeks
- Conservation:
- Between 8ºC - 16ºC
Containing: 6 Components
Macaron Shell
Ingredients: Macaron Shell
-
9.9 ozsugar
-
2.6 ozwater
-
3.4 ozEgg Whites #1
-
8.8 ozpowdered sugar
-
8.8 ozalmond flour
-
1.1 ozCP
-
3.4 ozEgg Whites #2
-
0.1 ozNatural brown coloring gel
-
0.2 ozAlbumen
Preparation: Macaron Shell
- Using the food processor, mix the almond flour, the icing sugar and the cocoa powder for 25 seconds. This preparation is called “Tant pour Tant” or TPT.
- Mix the egg whites #1 with the brown coloring to ensure a proper dissolution of the coloring.
- Transfer the TPT into a mixing bowl and mix until obtaining a homogeneous preparation.
- Add the water, followed by the sugar in a saucepan and bring to the boil. Place the water first to ensure that the sugar does not crystallize in the pan.
- In the meantime, place the eggs #2, sugar and albumen in the mixing bowl. Mix the albumen with some sugar to ensure that the mixture will be smooth.
- While mixing on low speed, heat the sugar mixture until reaching 110°C (230°F).
- Once at 110°C (230°F), change the mixer to high speed.
- Before folding the sugar into the preparation, verify that the egg whites have the right texture: the preparation should stick into the middle of the whisk.
- When the sugar and the water reach 119°C (246°F), fold into the egg whites and mix at low speed for a minute and then change to medium speed.
- Mix again until the meringue reaches 40°C (104°F). The preparation should hold stiff and glossy peaks when you lift the whisk out of the bowl.
- Fold the meringue into the TPT preparation in three different additions in order to combine well.
- Mix until obtaining a light and thick texture that forms ribbons.
- Transfer the batter into a piping bag with a 10 mm (0.4”) tip and pipe 5 cm (2”) discs of batter into staggered rows on the teflon sheets. This will ensure a better diffusion of the heat when baking in the oven.
- Gently tap the tray on the table to flatten the discs and smooth the surface of the shells.
- Let all the piped macaron shells set at room temperature until a thick skin starts to form on the shell. It usually takes 10 minutes but this drying process will depend on the humidity level in the room.
- To check whether the shells have dried enough to be baked, test with your finger: if no batter remains on your finger, the shells are ready to be baked.
- Bake in the oven at 150°C (302°F) for 9:45 minutes.
- Set aside and cool completely before assembling.
- Make sure that there are no air bubbles on your macaron shells. Air bubbles could appear for two reasons, either because the egg mixture has not been beaten enough, or the shells have dried for too long. Bake in the oven at 150°C (302°F) for 9:45 minutes.
- Set aside and cool completely before assembling. The macaron shells should not have any air bubbles. Air bubbles could appear because the egg mixture has not been beaten enough or because the shells have dried for too long.
View tools
- Cooktop
- Saucepan
- Metal Tray
- Whisk
- Thermometer
- Scissors
- Bowl scraper
- Mixing bowl (s)
- Tabletop mixer
- Thermomix or food processor
- Piping bag & 10 mm (0.4") tip
- Teflon sheet
- Spatula(s)
Pineapple Marmalade
Ingredients: Pineapple Marmalade
-
1.8 ozsugar
-
12.3 ozPineapple, cut in small pieces
-
0.2 ozCornstarch
-
0.7 ozrum
-
1 piece(s)Madagascar vanilla bean
Preparation: Pineapple Marmalade
- Heat the pineapple cubes and the sugar together.
- Scrape the vanilla seeds out of the bean and add the seeds to the pineapple mixture.
- In the meantime, mix the rum and the cornstarch together.
- When the water has evaporated and the pineapple cubes are translucent, keep heating for an extra minute and remove from the heat.
- Add the rum and the cornstarch into the pan and mix well.
- Place back on the cooktop, heat for one more minute and place in the fridge until completely cool.
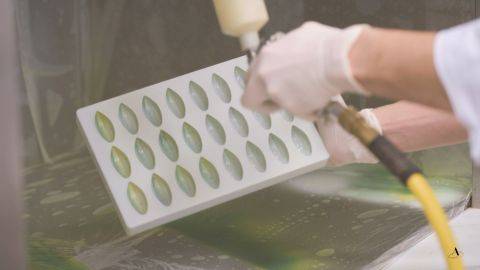
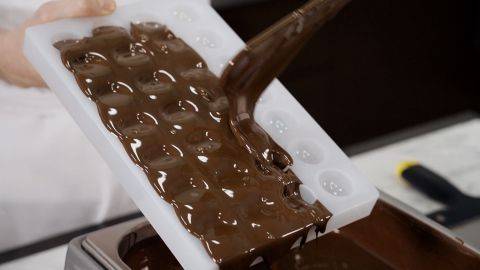
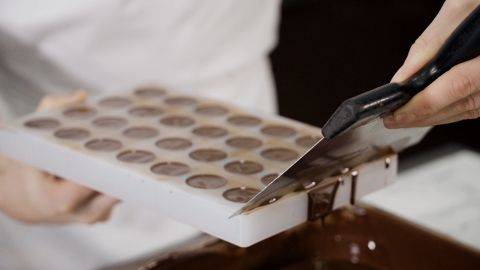
- Remove the mixture from the fridge, transfer into a piping bag and fill the silicon mold completely.
- Flatten the filling using a small palette knife and place in the freezer.
View tools
- Cooktop
- Saucepan
- Metal Tray
- Knife
- Thermometer
- Scissors
- Bowl scraper
- Mixing bowl (s)
- Thermomix or food processor
- Piping bag & 10 mm (0.4") tip
- Cutting board
- 2.5 cm (0.98”) silicon mold
- Spatula(s)
Dark Chocolate Crémeux
Ingredients: Dark Chocolate Crémeux
-
4.4 ozWhole milk
-
4.4 ozHeavy Cream 35%
-
1.6 ozegg yolks
-
1.2 ozsugar
-
2.1 ozCHM-Q415AR
-
0.5 ozGelatin mass (1:6 gelatin powder 200 bloom + water)
Preparation: Dark Chocolate Crémeux
- Bring the milk and cream to the boil.
- In the meantime, place the egg yolks and sugar into a mixing bowl and whisk well.
- Place the chocolates into a tall recipient.
- Pour half of the hot mixture onto the egg mixture for heat transfer to happen. This step is important in order to avoid thermal shock of the egg mixture.
- Transfer back into the saucepan and heat to 85°C (185°F).
- When the preparation reaches 85°C (185°F), add the gelatin mass and mix well until the gelatin has completely melted.
- Once the gelatin has completely melted, pour the warm mixture onto the chocolates and wait for one minute to allow enough time for heat transfer.
- Using an immersion blender, mix well until completely smooth.
- Place the chocolate mixture into the fridge and let it slightly solidify.
- Remove from the fridge, transfer into a piping bag and cut a small tip to control the flow.
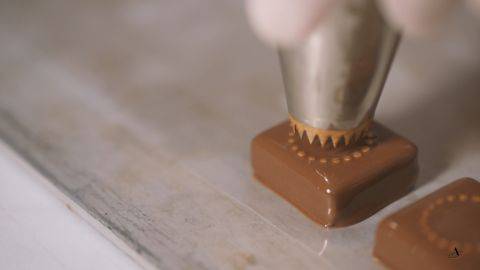
- Pipe onto the molds and fill the cavities completely.
- Place into the freezer.
View tools
- Cooktop
- Saucepan
- Metal Tray
- Tall recipient
- Thermometer
- Immersion blender
- Piping Bag
- Scissors
- Parchment paper
- Mixing bowl (s)
- Silicone Mold
- Spatula(s)
White Chocolate Coconut Whipped Cream
Ingredients: White Chocolate Coconut Whipped Cream
-
10.6 ozHeavy Cream 35%
-
0.4 ozinverted sugar
-
0.4 ozglucose syrup DE 38
-
7.1 ozcoconut puree
-
1.0 ozGelatin mass (1:6 gelatin powder 200 bloom + water)
-
1 piece(s)vanilla bean
Preparation: White Chocolate Coconut Whipped Cream
- Bring the cream, glucose syrup and inverted sugar to the boil.
- In the meantime, scrape the vanilla seeds out of the bean and add the seeds into the saucepan.
- Place the white chocolate into a tall recipient.
- When the mixture starts boiling, add the gelatin mass and remove from the heat.
- Once the gelatin has completely melted, pour the warm mixture onto the chocolates and wait for one minute to allow enough time for heat transfer.
- Using an immersion blender, mix well until completely smooth, add the coconut purée and mix again.
- Transfer into a mixing bowl, cover with plastic film and place in the fridge for at least 12 hours.
View tools
- Cooktop
- Saucepan
- Knife
- Tall recipient
- Immersion blender
- Mixing bowl (s)
- Plastic film
- Cutting board
- Spatula(s)
Chocolate Glaze
Ingredients: Chocolate Glaze
-
2.6 ozwater
-
5.3 ozsugar
-
5.3 ozglucose syrup DE 38
-
3.5 ozsweetened condensed milk
-
0.9 ozGelatin mass (1:6 gelatin powder 200 bloom + water)
Preparation: Chocolate Glaze
- Bring the water, sugar and glucose syrup to a boil.
- In the meantime, place the chocolate into a tall recipient.
- Pour the condensed milk and the gelatin mass onto the chocolate.
- Pour the hot mixture onto the chocolate and wait for 1 minute to allow enough time for heat transfer.
- Using an immersion blender, mix well until completely smooth.
- Transfer the preparation into a mixing bowl, cover with plastic film and place in the fridge for at least 12 hours.
- It is really important to use the glaze only once it has completely cooled down.
View tools
- Cooktop
- Saucepan
- Metal Tray
- Tall recipient
- Thermometer
- Immersion blender
- Piping Bag
- Scissors
- Parchment paper
- Mixing bowl (s)
- Plastic film
- Spatula(s)
Assembly
Ingredients: Assembly
-
Q.S.Roasted grated coconut
-
Q.S.Fresh coconut, cut in slices
Preparation: Assembly
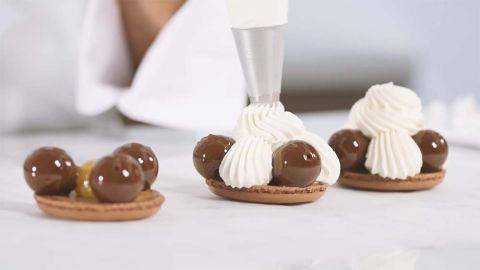
- Before assembling the macarons, line all the macaron shells facing upwards on parchment paper.
- Start by unmolding the frozen chocolate crémeux and place them onto a small rack.
- Before using the glaze, heat it back to 30°C (86°F) in the microwave and mix well in a tall recipient using an immersion blender. The glaze should be completely smooth and with no air bubbles.
- Transfer the glaze into a piping bag and start glazing the frozen chocolate crémeux.
- Place the crémeux back into the freezer for 5 minutes.
- Unmold the pineapple marmalade and directly place at the center of the macaron shell.
- Using wooden skewers, transfer three glazed spheres of chocolate crémeux onto each of the shells.
- Transfer the whipped cream into a mixing bowl and mix on high speed using the table- top mixer. The preparation should hold stiff and glossy peaks when lifting the whisk out of the bowl.
- Transfer the cream into the piping bag and pipe onto the shells, in between the glazed chocolate crémeux and in the middle of them, on top of the garnish.
- Place the slices of fresh coconut onto the glazed spheres of chocolate crémeux and sprinkle some roasted grated coconut on top of the whipped cream.
- Add a mini macaron on top of the whipped cream in the middle of the shell, place the macaron onto a serving board and refrigerate at 4°C (39°F).
View tools
- Metal Tray
- Whisk
- Tall recipient
- Immersion blender
- Microwave
- Scissors
- Bowl scraper
- Parchment paper
- Gloves
- Mixing bowl (s)
- Tabletop mixer
- Small Rack
- Piping bag & 20 mm (0.8”) star tip
- Wooden Skewers
- Disposable cake boards
- Spatula(s)
Facing Problems with your Creations?
- Find troubleshooting guides & tutorials
- Chat live with an advisor chef and find the right solution to your challenges


Comments
Submitted by Sarah Sauvage on Thu, 12/07/2023 - 03:34
Bonjour !
I wonder if egg whites and food coloring can be mixed with an immersion blender before whipping
- for a better consistency when whipping and baking,
- or would it damage the texture of the egg whites?
-Sarah
Submitted by Miranda K - Ch… on Thu, 12/07/2023 - 22:12
In reply to Bonjour ! I wonder if egg… by Sarah Sauvage
Hi, Sarah. I passed your question on to Chef Nico; here's his response:
Good morning ,
I recommend that you mix the coloring into the raw egg whites that you mix with the T.P.T. There is no point in mixing the whites with coloring , and depending on the brand of the coloring, the color can sometimes damage the texture .