-
Good to go
-
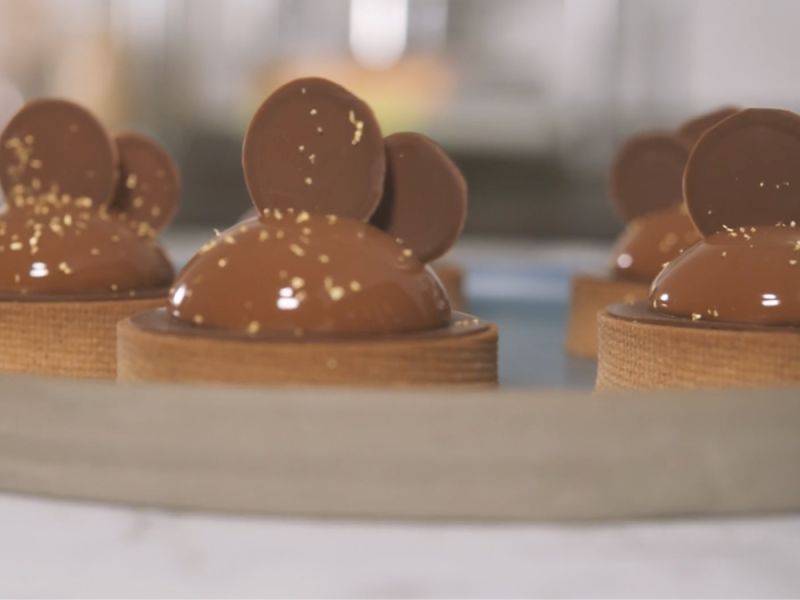
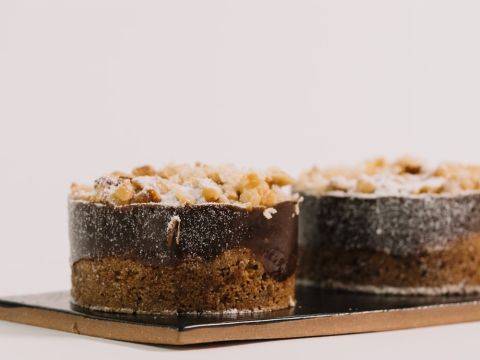
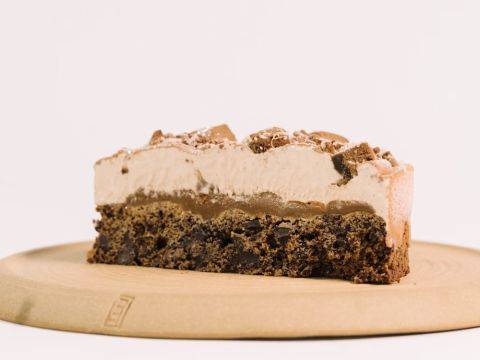
Timeless Classics
Passion fruit, caramel and chocolate are a winning combination and will win your customers over for sure!Passion fruit, caramel and chocolate are a winning combination and will win your customers over for sure!
- Shelf life:
- 6 Weeks
- Conservation:
- Between 8ºC - 16ºC
Containing: 8 Components
Hazelnut Pâte Sablée
Ingredients: Hazelnut Pâte Sablée
-
8.8 ozButter softened
-
6.0 ozpowdered sugar
-
0.1 ozsalt
-
3.5 ozEggs, whole
-
4.4 ozhazelnut flour
-
1.1 lbAll purpose flour
Preparation: Hazelnut Pâte Sablée
- Mix the soft butter, which should be at around 24°C (75°F) with the hazelnut paste, the powdered sugar and the salt in a saucepan.
- Add the eggs slowly until completely incorporated into the butter mix.
- Add the hazelnut flour.
- Add the all-purpose flour until just incorporated.
- Mix until the dough is warm. Do not over mix to prevent the dough from shrinking in the oven.
- Pour the dough over a plastic sheet and make it square.
- Leave to rest in the refrigerator.
- Roll the dough out to 2.5-3 mm (0.1-0.12”) thickness. Use a plastic sheet to prevent the dough from sticking without the need to use flour.
- Using the bicycle, cut the dough into long strips of 26 cm (10.2”).
- Cover the dough strips with a plastic sheet. This will prevent them from drying.
- Put in the fridge for at least an hour.
- Using the 7.5 cm (3”) ring cutter, cut the dough into round discs and cover them with a plastic sheet to avoid drying. It is important that the width of the dough strips is the same as the height of the ring cutter.
- Put the 8 cm (3.15”) metal ring on the silicon mat, place the silicone strip into the mold and add the rectangular dough strip on the silicon strip.
- Cut off the excess with a knife and push the dough to the side.
- Place the 7.5 cm (2.95”) discs into the molds. Silicone strips ensure an even cooking regardless of the power of the oven and give a nice texture.
- Line the tart molds, bake at 160°C (320°F).
- Once the shells are baked, unmold and leave at 16-18°C (61-64°F).
View tools
- Knife
- Parchment paper
- Mixing bowl (s)
- Rolling pin
- Silicone mat
- Tabletop mixer, mixing bowl and a whisk
- Bicycle (5 or 6-wheel cutter)
- Spatula
- 2.5 cm (0.98”) silicone strips
- 7.5 cm (2.95”) ring cutter
- Tart ring 8 cm (3.15”)
Almond Biscuit
Ingredients: Almond Biscuit
-
8.8 ozEggs, whole
-
0.4 ozalmond oil
-
5.3 ozpowdered sugar
-
5.3 ozalmond flour
-
6.0 ozegg white
-
15.4 grcream of tartar
-
1.8 ozsugar
-
1.8 ozAll purpose flour
-
0.1 ozbaking powder
-
2.8 ozmarzipan
Preparation: Almond Biscuit
- Mix the eggs, the almond praliné, the powdered sugar, the almond flour and the almond oil at medium speed until obtaining a fluffy texture.
- Using the tabletop mixer, mix the egg whites with ¼ of the sugar and the cream of tartar until obtaining a frothy texture.
- Sift the flour and baking powder together over parchment paper.
- Incorporate the egg whites into the first mixture and mix well.
- Add the flour mixture and mix well until obtaining a homogeneous preparation.
- Pour the preparation over onto a silicon mat and roll out to 5 mm (0.2”) thickness.
- Bake at 200°C (392°F) for about 12 minutes.
- Once baked, cover the biscuit with parchment paper and a metal tray, flip it over and unmold.
- Using the 7 cm (2.8”) ring cutter, cut the almond biscuit into discs and immediately wrap them in plastic film.
View tools
- Metal Tray
- Parchment paper
- Offset spatula
- Mixing bowl (s)
- Rack
- Silicone mat
- Tabletop mixer, mixing bowl and a whisk
- Spatula
- 8 cm (2.8”) ring cutter
- Sieve
Caramel with Passion Fruit
Ingredients: Caramel with Passion Fruit
-
3.5 ozsugar
-
2.1 ozpassion fruit puree
-
1.4 ozheavy cream
-
2.8 ozglucose syrup DE 38
-
2.1 ozcondensed milk
-
2 beans(s)vanilla bean
-
6.0 ozsalted butter
-
11.8 ozCallebaut Cocoa Butter
Preparation: Caramel with Passion Fruit
- Scrape the vanilla seeds out of the vanilla beans.
- Heat the passion fruit purée, the cream, the glucose syrup, the vanilla seeds and the condensed milk above 50°C (122°F) in a saucepan.
- Caramelize the sugar in a heavy bottomed saucepan by adding the sugar little by little.
- Deglaze with the hot cream.
- Boil the mixture for one minute, pour it into a tall recipient and strain it to make sure that the final mixture is perfectly smooth.
- Cool the caramel down to 40°C (104°F).
- Add the cocoa butter, followed by the butter.
- Emulsify well using an immersion blender and set aside.
View tools
- Cooktop
- Saucepan
- Knife
- Tall recipient
- Strainer
- Immersion blender
- Cutting board
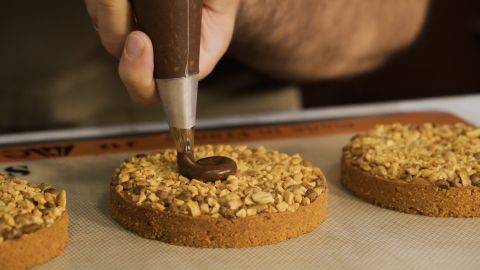
Pre-Assembly
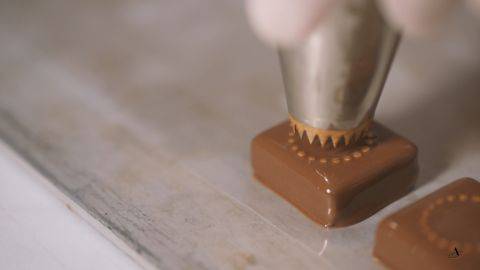
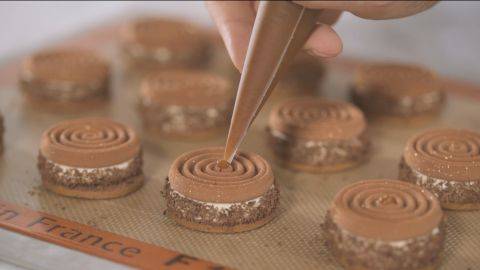
- Transfer the caramel into the piping bag.
- Place the biscuit into the shells.
- Pipe the caramel over the biscuit and fill the shells completely.
- Put them in the fridge for 10-15 minutes to let the caramel set.
View tools
- Metal Tray
- Piping Bag
- Parchment paper
Chocolate & Caramel Mousse
Ingredients: Chocolate & Caramel Mousse
-
13.4 ozHeavy cream 35% fat #2
-
2 beans(s)vanilla bean
-
0.1 ozsalt
-
1.5 ozGelatin mass (1:6 gelatin powder 200 bloom + water)
Preparation: Chocolate & Caramel Mousse
- Whip the cream #1 until obtaining soft peaks.
- Scrape the vanilla seeds out of the vanilla beans.
- Mix the cream #2, the salt and the vanilla seeds.
- Bring to a boil and set aside.
- Caramelize the sugar in a heavy bottomed saucepan by adding the sugar little by little.
- Deglaze with the hot cream.
- Add the gelatin mass.
- Place the chocolate into a tall recipient and pour the liquid onto the chocolate using a strainer to make sure that the final mixture is perfectly smooth.
- Using an immersion blender, mix until obtaining a very smooth mixture.
- Slowly pour the chocolate onto the whipped egg whites and mix until obtaining a homogeneous texture.
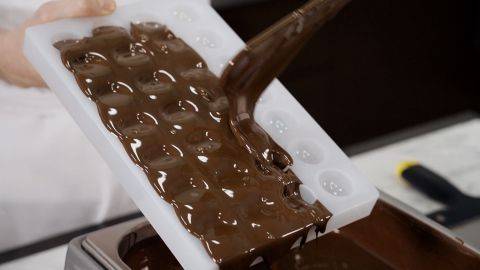
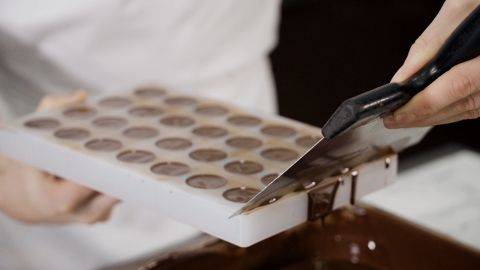
- Transfer the mixture into a piping bag, pipe into the molds and fill them completely.
- Freeze until solid enough to be unmolded.
View tools
- Cooktop
- Saucepan
- Whisk
- Knife
- Tall recipient
- Immersion blender
- Mixing bowl (s)
- Spatula
- Silicone molds with 6 cm (2.4”) holes
Chocolate Passion Fruit Glaze
Ingredients: Chocolate Passion Fruit Glaze
-
5.3 ozpassion fruit puree
-
3.5 ozsugar
-
6.0 ozcaramel powder
-
9.5 ozglucose syrup DE 38
-
6.8 ozcondensed milk
-
7.2 ozGelatin mass (1:6 gelatin powder 200 bloom + water)
-
3.9 ozNeutral glaze
Preparation: Chocolate Passion Fruit Glaze
- Mix the passion fruit purée, the sugar, the caramel powder and the glucose syrup and bring to a boil.
- Add the condensed milk and the gelatin mass, and strain.
- Pour the mixture over the chocolate.
- Add the neutral glaze and mix using the immersion blender to obtain an emulsion.
- Cover with plastic film and let set overnight in the fridge.
- Use at 31-33°C (88-91°F) over a frozen product.
View tools
- Metal Tray
- Offset spatula
- Mixing bowl (s)
- Guitar sheets
- Silicone mat
- Cutter
- Wooden Skewers
Decoration
Ingredients: Decoration
-
IBC pure gold flakes
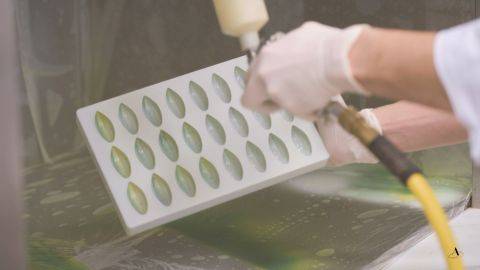
Preparation: Decoration
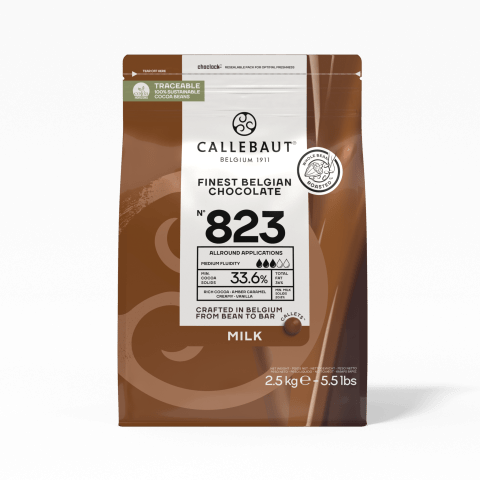
- Pour pre-crystallized milk chocolate onto a plastic sheet and cover with a second sheet.
- Using a rolling pin, spread the chocolate until obtaining a very thin layer.
- Let the chocolate crystallize.
- Press the 2.5 cm (0.98”), 3 cm (1.2”) and 7.5 cm (2.95”) ring cutters onto the plastic sheet to create discs.
- Place them in the fridge for 5 minutes and let them set.
View tools
- Metal Tray
- Mixing bowl (s)
- Melting kettle or automatic tempering machine
- Guitar sheets
- Rolling pin
- 2.5 cm (0.98”), 3 cm (1.2”) and 7 cm (2.8”) ring cutters
Final Assembly
- Peel off the 7.5 cm (2.95”) chocolate rings from the plastic sheet and place them on top of the caramel tarts.
- Unmold the frozen mousse, place them on the cooling rack and pour the glaze onto the frozen mousse until completely covered.
- Using a wooden skewer, put the mousse on the hot plate in order to melt the excess glaze and stick it on top of the caramel tart.
- Using an offset spatula, peel off the 2.5 cm (0.98”) and the 3cm (1.2”) discs of chocolate from the plastic sheet and place them on top of the glazed mousse to decorate.
- For the final touch, sprinkle some gold flakes.
View tools
- Cooktop
- Saucepan
- Metal Tray
- Knife
- Offset spatula
- Guitar sheets
- Rolling pin
- Rack
- Wooden Skewers
Facing Problems with your Creations?
- Find troubleshooting guides & tutorials
- Chat live with an advisor chef and find the right solution to your challenges


Comments