
Easy
-
Timeless Classics
-
Short preparation time
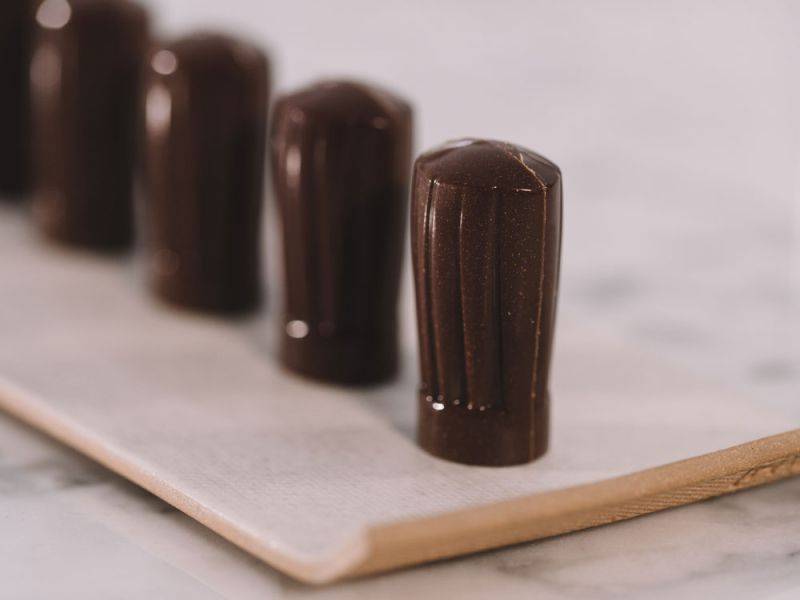
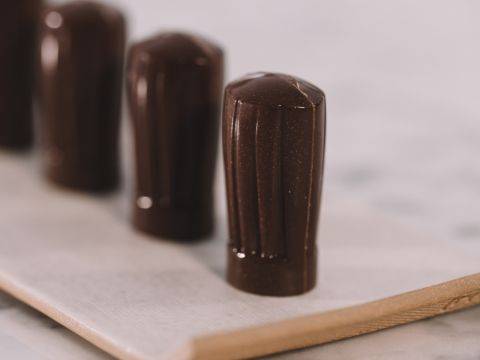
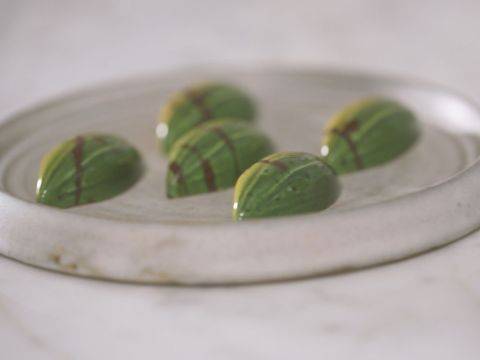
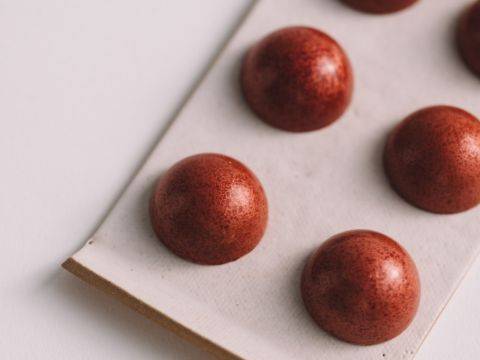
The irresistible combination of milk chocolate and hazelnuts is the star in this 3-D molded bonbon.The irresistible combination of milk chocolate and hazelnuts is the star in this 3-D molded bonbon.
- Shelf life:
- 6 Weeks
- Conservation:
- Between 8ºC - 16ºC
Containing: 2 Components
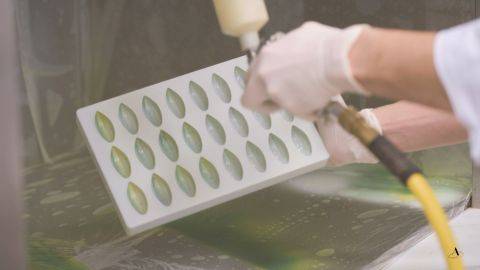
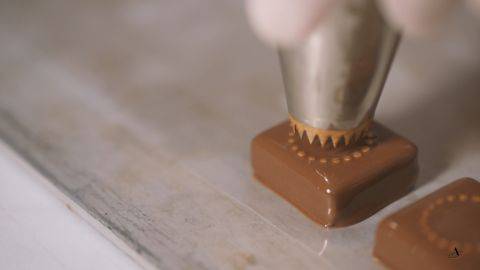
Spraying
Ingredients: Spraying
Preparation: Spraying
- Add melted red cocoa butter and gold powder into a preparation made of 50% of cocoa butter and 50% of dark chocolate and mix well using an immersion blender.
- Transfer into a piping bag and pre-crystallize the preparation to 30-31°C (86-88°F) on the marble.
- Once at 30-31°C (86-88°F), transfer into a spray gun and immediately spray onto the mold in both directions to make sure that the preparation is evenly spread.
- When spraying, always keep the same distance and angle between the mold and the spray gun.Immediately place the mold upside down on a paper towel and clean well.
- Repeat the same procedure with a second mold and let the molds set at 18-20°C (64-68F°)
Tools
- Immersion blender
- Piping Bag
- Scissors
- Spray gun
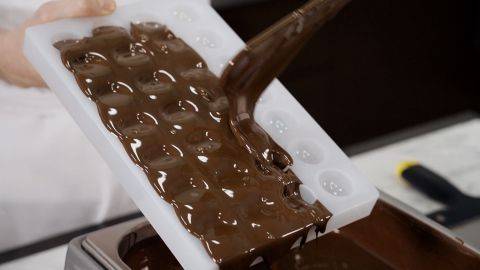
Double moulding
Ingredients: Double moulding
Preparation: Double moulding
- Use a large spoon to fill the mold with pre-crystallized milk chocolate and make sure the mold is completely filled.
- Tap the mold on the table to remove the air bubbles.
- Immediately turn the mold upside down over your melting kettle and using the handle of the palette knife, tap the side of the mold to remove the excess chocolate.
- Clean the mold well with the palette knife.
- Place the mold upside down onto a metal tray lined with parchment paper for a few minutes until the chocolate starts to set.
- Turn the mold over and remove the excess chocolate using a scraper.
- Repeat the same procedure with the second mold.
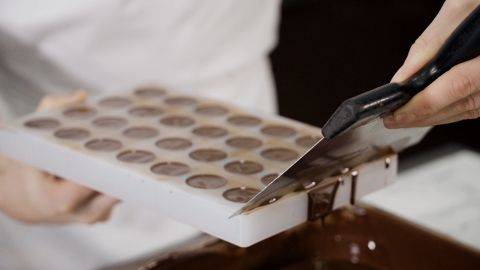
- Pour pre-crystallized gianduja into the mold and spread it out evenly using a palette knife. Make sure that all the cavities are evenly filled.
- Hold the mold horizontally and the scraper at a 45° angle to scrape the excess gianduja. The cavities will remain slightly overfilled, which will help sticking the two halves of the bonbon together and prevent air bubbles from appearing.
- Repeat the same procedure for the second mold.
- Close the two molds together and use clips to maintain them together.
- Place the molds, standing on their edge, into the fridge at 10-12°C (50-54°F) with a good air flow until the chocolate has contracted.
- It is important to immediately place the molds in the fridge because the thickness of the gianduja layer in the mold will have an impact on the cooling procedure: the thicker the layer, the quicker the cooling.
- If the cooling is too slow, the gianduja will turn gray. When crystallizing, the gianduja creates warmth that has to be stopped within an acceptable time.
- Remove from the fridge and check whether any condensation has occured. In case of condensation, let the molds get back to 18-20°C (64-68°F) before unmolding.
- Remove the clips, gently tap the molds on the table and unmold.
Tools
- Metal Tray
- Scraper
- Parchment paper
- Offset spatula
- Melting kettle or automatic tempering machine
- Mold clips
- Chef hat mold
- Spoon
Need support with your chocolate confections?
- Find troubleshooting guides & tutorials
- Chat live with an advisor chef and find the right solution to your challenges


Comments