
Medium
Makes: 50
-
Timeless Classics
It's always great to explore these classic recipes and the techniques required to create them. The classics are always the starting point for creativity.It's always great to explore these classic recipes and the techniques required to create them. The classics are always the starting point for creativity.It's always great to explore these classic recipes and the techniques required to create them. The classics are always t...
- Shelf life:
- 4 - 6 Weeks
- Conservation:
- Between 8ºC - 16ºC
Containing: 4 Components

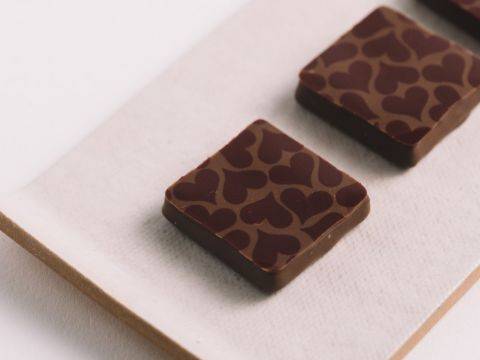
Decoration: Chocolate Discs
Ingredients: Decoration: Chocolate Discs
-
Q.S.Callebaut Single Origin - Madagascar
Preparation: Decoration: Chocolate Discs
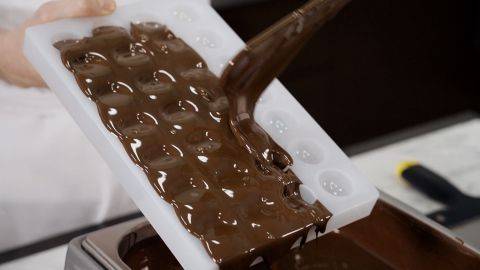
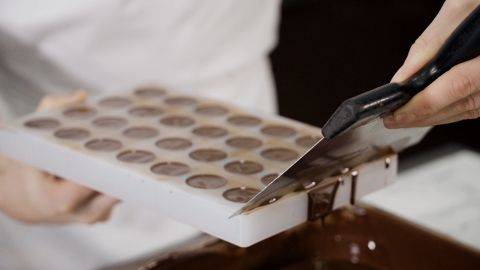
- Using a damp towel, attach a plastic sheet to the metal tray and remove the air bubbles using a scraper.
- Pour pre-crystallized dark chocolate onto the metal tray and spread it out evenly using the offset spatula to create a thin layer.
- Allow the chocolate to begin to set and use the ring cutter to cut out the discs.
- Cover the discs with parchment paper, turn the tray over and let the chocolate set at 18-20°C (64-68°F).
- Once the chocolate has fully set, remove the plastic sheet on the top and gently peel off the chocolate discs using a ruler. Store at 18-20°C (64- 68°F) for future use.
Tools
- Metal Tray
- Knife
- Scraper
- Bowl(s)
- Parchment paper
- Offset spatula
- Ruler (s)
- Damp Towel
- Plastic Sheets
- 30 mm (1.2") ring cutter
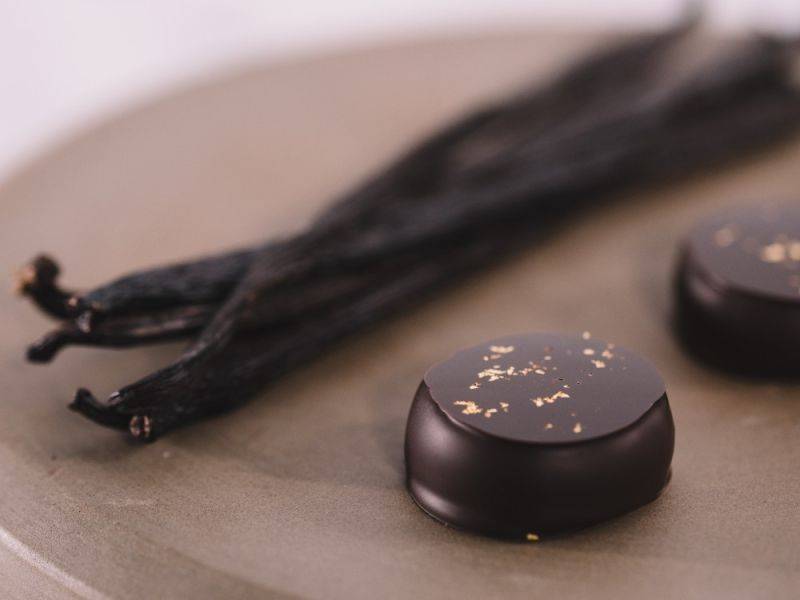
Dark Chocolate & Vanilla Ganache
Ingredients: Dark Chocolate & Vanilla Ganache
-
5.5 ozHeavy Cream 35%
-
0.4 ozMadagascar vanilla bean
-
1.6 ozglucose syrup DE 38
-
1.6 ozinverted sugar
-
15.4 grsalt
-
0.7 ozbutter, clarified
-
8.0 ozCallebaut Single Origin - Madagascar
-
0.2 ozCallebaut Cocoa Butter
Preparation: Dark Chocolate & Vanilla Ganache
- Scrape the vanilla seeds out of the beans and place both the beans and the seeds into the cream.
- Cover with plastic film and cold infuse the heavy cream with the vanilla pods for 24 hours in the refrigerator.
- Place the chocolate into a tall recipient, followed by the cocoa butter and the clarified butter.
- Melt in the microwave for 30 seconds at a time at high power. Stir and place back in the microwave for an additional 30 seconds. The finale temperature of the chocolate should be 40°C (104°F).
- Add the glucose syrup, inverted sugar and salt to the infusion and heat to dissolve the sugars and the salt.
- The final temperature of the liquid should be 30°C (86°F).
- Strain the infusion onto the melted chocolate mixture, remove the beans and emulsify the ingredients with an immersion blender.
- Allow the ganache to cool down to about 29°C (84°F) to obtain a good piping consistency and transfer into a piping bag.
Tools
- Cooktop
- Saucepan
- Knife
- Tall recipient
- Strainer
- Thermometer
- Immersion blender
- Microwave
- Piping Bag
- Bowl(s)
- Plastic film
- Spatula(s)
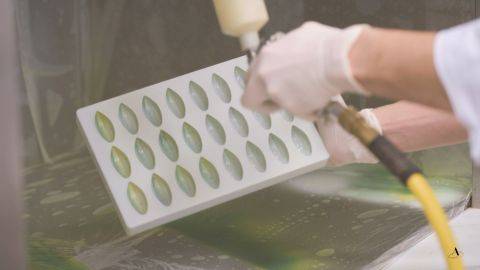
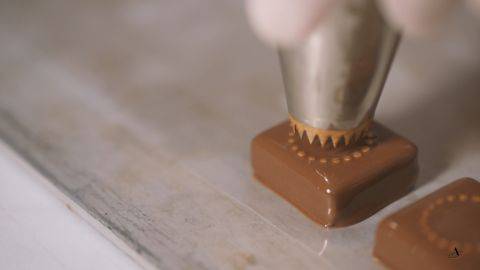
Piping
- Time to pipe the ganache into the stencil.
- Using a damp towel, attach a plastic sheet to the metal tray, remove the air bubbles and place the stencil onto the plastic sheet.
- Pipe the ganache into the stencil and using an offset spatula, flatten the ganache and remove the excess ganache.
- Carefully remove the stencil.
- Transfer the chocolate discs on top of the piped ganache and gently press onto them to make sure that they stick onto the ganache.
- Then, allow the ganache to fully crystallize at 18-20°C (64-68°F) for at least 12 hours but preferably overnight.
Tools
- Metal Tray
- Knife
- Scissors
- Offset spatula
- Damp Towel
- Plastic Sheets
- 30 mm (1.18") stencil
Dipping
Ingredients: Dipping
-
Q.S.Edible Gold Leaf
-
Q.S.Callebaut Single Origin - Madagascar
Preparation: Dipping
- Once well crystallized, cover the bonbons with parchment paper and a metal tray, and flip over.
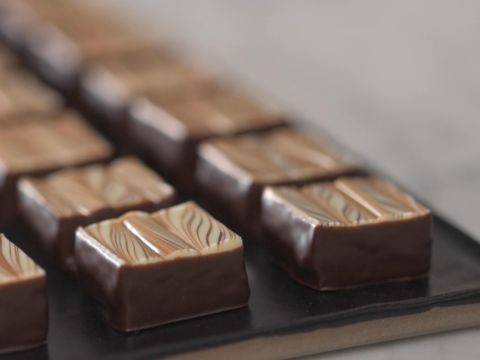
- Using a large scraper, remove the bonbons from the plastic sheet, dip them into pre-crystallized dark chocolate and place them on a metal tray lined with a plastic sheet. For more information about dipping, refer to my previous courses.
- Use a brush to garnish the bonbons with gold flakes, then immediately place a square of plastic on top of the dipped bonbons and gently press it to make sure that it covers the entire surface of the bonbon and that the top has a round shape.
- Let the bonbons set at 18-20°C (64-68°F) for at least 4 hours but preferably overnight.
- Place them in the refrigerator for 15 minutes to facilitate the removal of the plastic sheet from the top of the bonbons. This ensures that the plastic sheet comes cleanly away and leaves a shiny finish.
Tools
- Metal Tray
- Scissors
- Scraper
- Parchment paper
- Offset spatula
- Gloves
- Melting kettle or automatic tempering machine
- Heat gun
- Dipping fork
- Brush
- Plastic Sheets
- 25 mm (1") plastic sheets
Need support with your chocolate confections?
- Find troubleshooting guides & tutorials
- Chat live with an advisor chef and find the right solution to your challenges


Comments