

Medium
Makes: 42
-
Good to go
Basil and lime pair really well with the fresh, sour notes of Ruby. This recipe also contains vanilla yogurt which lends a sweet/sour note.Basil and lime pair really well with the fresh, sour notes of Ruby. This recipe also contains vanilla yogurt which lends a sweet/sour note.Basil and lime pair really well with the fresh, sour notes of Ruby. This recipe also contains vanilla yogurt which lends...
- Shelf life:
- 6 Weeks
- Conservation:
- Between 8ºC - 16ºC
Containing: 5 Components
Preparing The Molds
Ingredients: Preparing The Molds
-
100 g
-
-
100 g
Preparation: Preparing The Molds
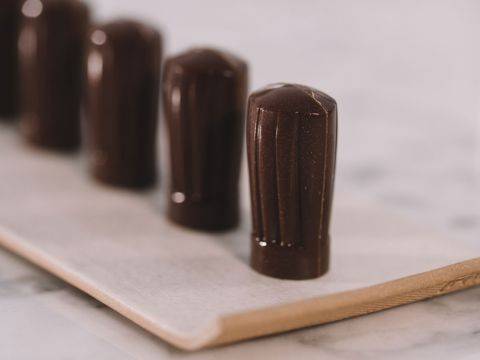
- To clean the molds, dip a corner of the paper towel into alcohol and clean each individual mold carefully.
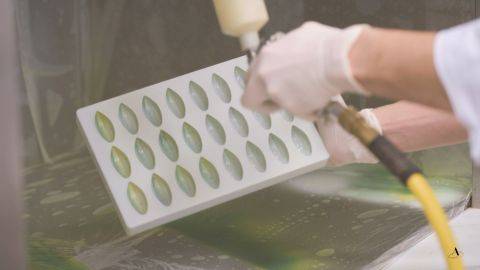
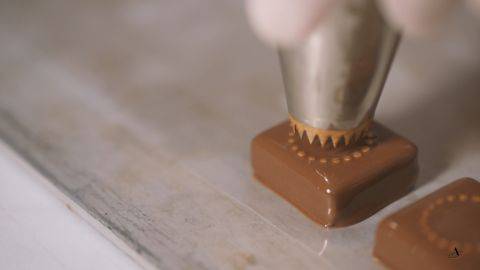
- Pour the melted red cocoa butter into a piping bag and tie the bag. Check the temperature and roll it on a marble counter or work surface until it reaches 27°C (81°F).
- Cut a small hole in the piping bag and pour it into a spray gun.
- Change the amount of air pressure passing through the spray gun until you reach the desired effect then spray the molds evenly.
- Turn the mold over on a piece of paper towel and wipe it clean. Let it set for 10 minutes.
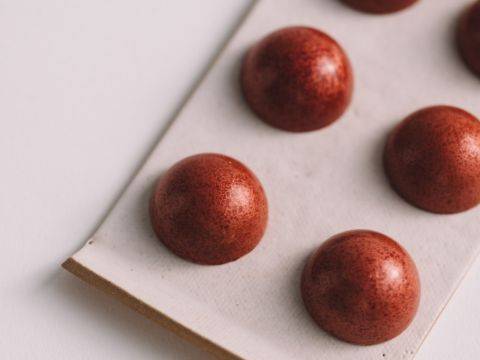
- Use a round tip brush to tap some creative powder Scarlet inside each mold. Tap the molds on the work surface to remove the excess powder.
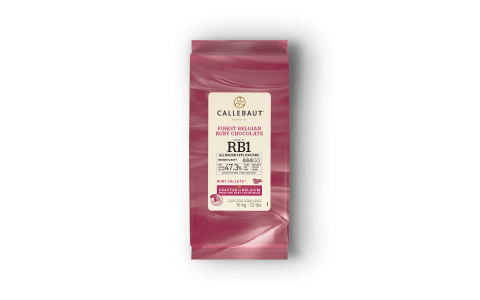
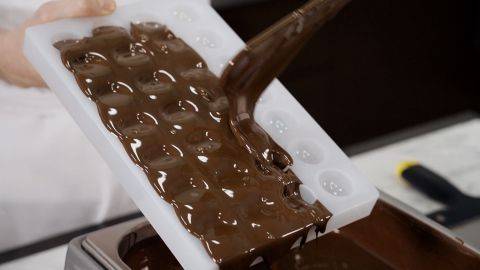
- Make sure the tempered Ruby RB1 is between 27-29°C (81-84°F) before pouring it into a piping bag. Cut a small hole in the bag.
- Pipe a small quantity of Ruby RB1 into each mold and tap the mold to remove any unwanted air bubbles. Turn the mold over, tap out and scrape any excess. Turn the molds upside down and let them set at least 1 hour at 16°C (61°F).
- Save the rest of the tempered Ruby RB1 for the decorations (see next component).
Tools
- Thermometer
- Piping Bag
- Scissors
- Scraper
- Bowl(s)
- Fine round tip brush
- Spray gun
- Gloves
- Paper towel
- Mixing bowl (s)
- Silicone mat
- Cortador
- Spatula
Decorations
Ingredients: Decorations
Preparation: Decorations
- Pour some of the tempered Ruby RB1 into a piping bag (or paper cone) and cut a small hole.
- Wrap the rolling pin with parchment paper and pipe some fine lines of Ruby RB1 on it. Let it set.
- Save the rest of the tempered Ruby to seal the molds later on (see component 4).
Tools
- Piping Bag
- Scissors
- Parchment paper
- Paper cones
Lime Gelée
Ingredients: Lime Gelée
-
66 glime puree
-
47 gapricot puree
-
85 gsugar
-
2 glime zest
Preparation: Lime Gelée
- Mix all the ingredients together in a saucepan and whisk well. Heat on high heat while whisking and bring to the boil and continue cooking until the mixture reaches 105°C (221°F). Strain and cool completely before using.
- Pour the gelée into a piping bag and cut a small hole. Pipe one small drop into each cavity of the prepared molds. Tap lightly and let dry for a minimum of 4 hours so the gelée develops a slight crust.
Tools
- Cooktop
- Saucepan
- Whisk
- Strainer
- Thermometer
- Piping Bag
- Scissors
- Bowl(s)
- Spatula
Ruby Ganache With Lime And Basil
Ingredients: Ruby Ganache With Lime And Basil
-
119 gWhole milk
-
4 gbasil leaves
-
4 gbeetroot powder
-
25 g
-
40 gsorbitol powder
-
25 gdextrose
-
33 gglucose syrup
-
21 g
Preparation: Ruby Ganache With Lime And Basil
- Warm the milk to 40°C (104°F) and add in the chopped basil. Let it infuse for 10 minutes at room temperature.
- Add the beetroot powder, yogurt and sugars to the milk and basil mixture. We use glucose syrup, dextrose and sorbitol instead of regular sugar to allow for a longer shelf life.
- Mix well.Mix the butter and Ruby RB1 together and microwave in one minute bursts until the mixture is completely melted and reaches 30°C (86°F).
- When both preparations are ready, strain the liquid mixture into the Ruby mixture and blend using an immersion blender until completely emulsified.
- Pour the ganache into a piping bag equipped with a no. 8 round tip. Fill each Ruby mold ¾ of the way then tap the molds to remove any air bubbles. Let the ganache crystallize overnight in a cool place, preferably at 16°C (61°F).
Tools
- Metal Tray
- Whisk
- Strainer
- Thermometer
- Immersion blender
- Microwave
- Piping Bag
- Bowl(s)
- Parchment paper
- Round tip No. 8
- Spatula
Closing The Molds
Ingredients: Closing The Molds
Preparation: Closing The Molds
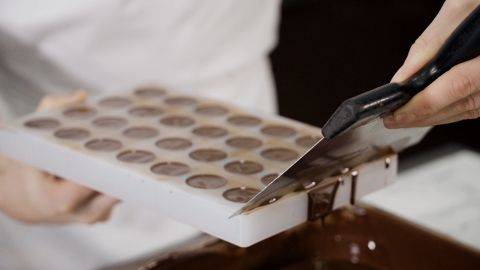
- Take some tempered Ruby RB1 and pour into a piping bag. Cut a hole in the bag and pipe a line of Ruby onto each row of Ruby molds.
- Place the acetate sheet on the mold and scrape hard until all the excess Ruby RB1 is removed.
- Slide onto a tray and place in a cool place at 16°C (61°F) for at least 2 hours before unmolding.
- Remove the acetate sheet and twist your mold to make sure the rubies are loose. Turn the mold upside down and tap it on your work surface to release the rubies.
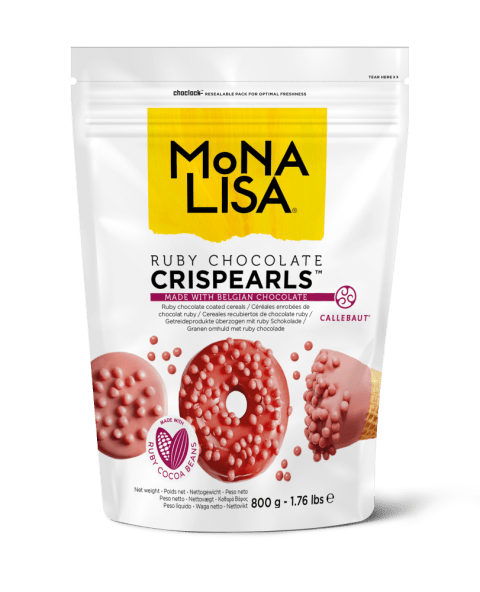
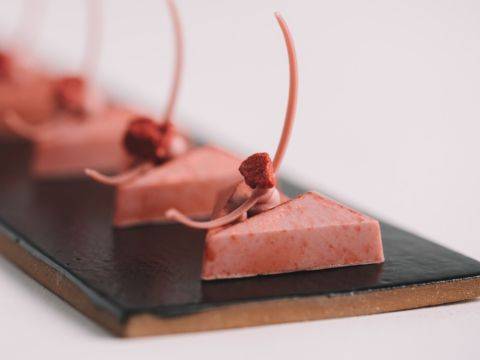
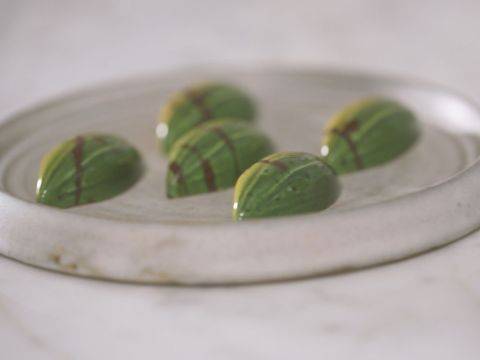
- Decorate with other small decorations such as strawberry Crisp Pearls™ or freeze dried raspberries. Remove the decorations from the rolling pin carefully and attach one to each rubie with a small drop of tempered Ruby RB1 using some freeze spray as needed.
Tools
- Piping Bag
- Scissors
- Scraper
- Acetate sheet: cut to size of mold
- Gloves
- Paper cones
- Freeze Spray
- Spatula
Need support with your chocolate confections?
- Find troubleshooting guides & tutorials
- Chat live with an advisor chef and find the right solution to your challenges


Comments